
How to Use a Rowing Machine: Setup and Proper Form

Founder
I founded HomieGym to help you make informed decisions about training at home. My background includes university-level sports science education, practical coaching, gym training and combat sports.
Equipment editor on our team: Milutin Tucakov
Learning how to use a rowing machine is easier once the movement stops feeling like several jobs at once. Your legs, body, and arms work in sequence to create a stroke you can repeat at a comfortable pace.
I would spend the first session finding that rhythm before chasing speed or distance. This guide takes you from setting up the machine to practicing the stroke, with simple ways to spot the mistakes that make rowing feel awkward. It also explains the monitor, so you can understand the numbers without letting them rush your technique.
Table of Contents
How to Use a Rowing Machine: Set Up First
Sit on the sliding seat, adjust the foot supports to your shoes, and secure the straps before taking the handle. Check that the machine is stable and that the seat can travel freely. Keep loose clothing, shoelaces, and nearby objects clear of moving parts.
On a Concept2 RowErg, adjust the heel cups so the strap crosses the widest part of each foot. Tighten it enough to keep the shoe secure without pinching. Then slide forward gently: you should be able to reach a comfortable starting position with your shins nearly upright when viewed from the side, without forcing a deeper slide. Foot size, shin length, and shoes all affect the adjustment, so copying someone else's footplate number is a poor shortcut.
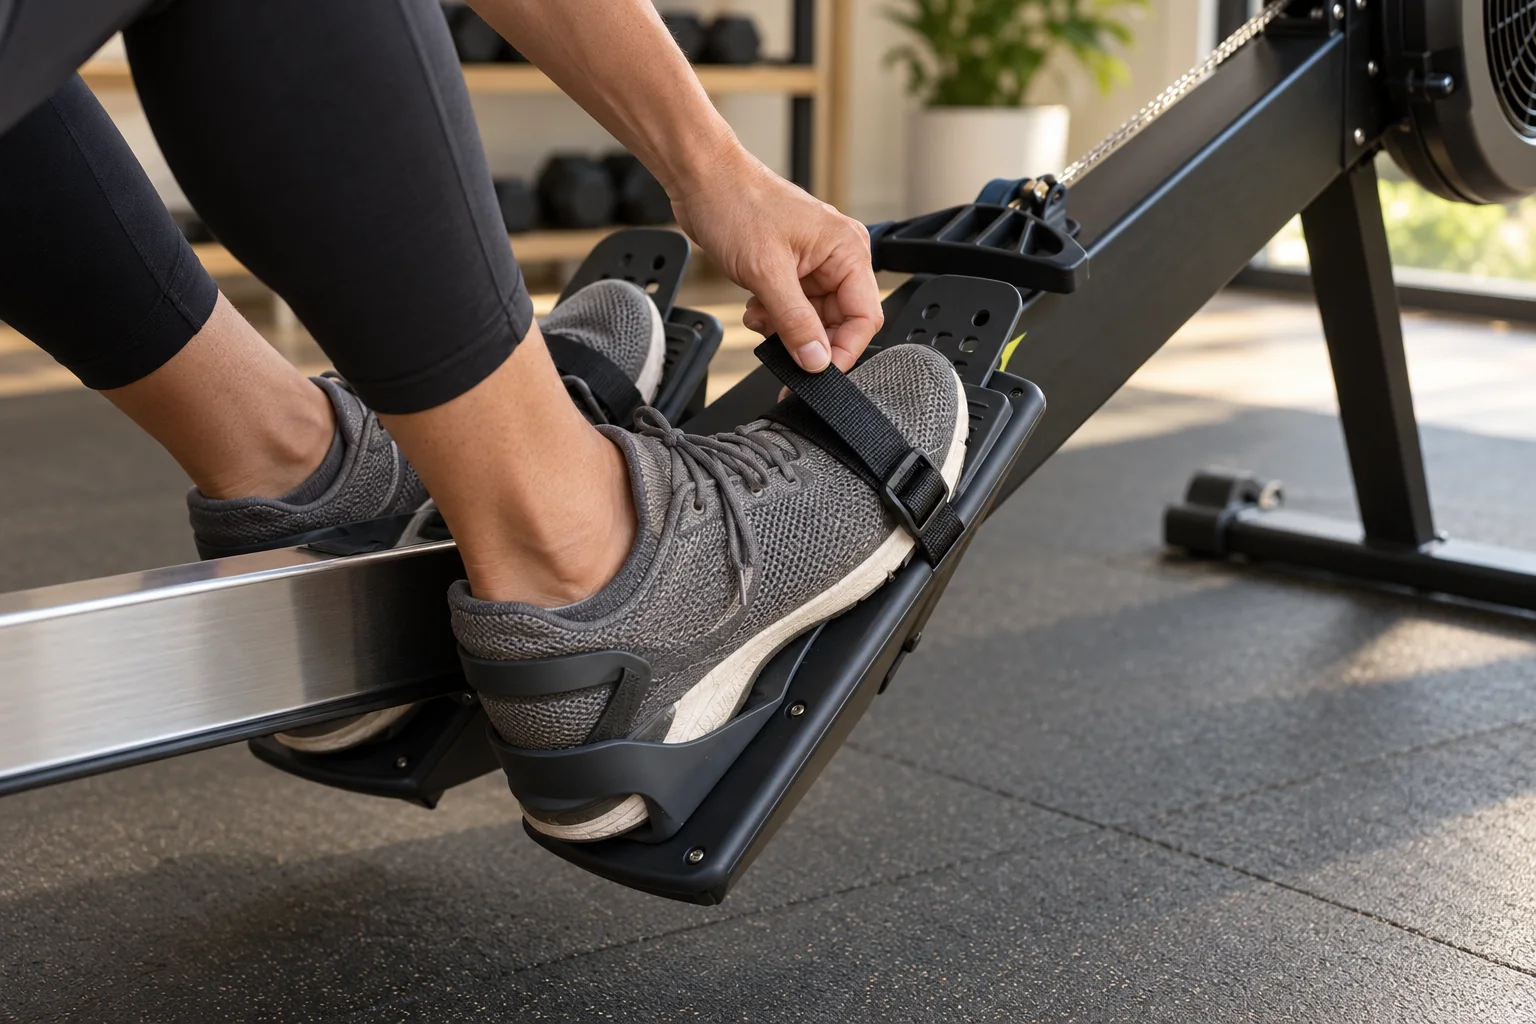
Check the foot position again if you change to shoes with a noticeably thicker sole. Use the fit and movement as your guide. A strap that sits across the ankle, a heel that will not fit in its cup, or a position that feels cramped deserves attention before you start pulling.
The model shown here is the Concept2 RowErg with standard legs. Other rowers have different adjustments and controls; follow your model's manual for those details.
Choose a Setting You Can Control
Choose a setting that lets you move smoothly while learning. On a Concept2, the numbered lever beside the fan is a damper: it changes airflow and the feel of the stroke. Concept2 recommends starting between 3 and 5, rather than automatically setting it to 10.
You can still row hard at a lower damper setting: pushing harder makes the flywheel resist more. Think of the lever as a way to change the feel of each stroke, rather than a difficulty score you need to increase.
That 3-to-5 recommendation is specific to Concept2's system. Do not transfer it to a magnetic rower's numbered resistance levels or assume a water rower uses the same controls. For an unfamiliar machine at the gym, ask staff to show you the adjustment before changing it. On a water rower such as the WaterRower Club, the paddle moving through the tank sets the feel, so your stroke controls the effort. If you need one that folds away, the WENOKER RW51 and the YOSUDA Classic 22L are both folding water rowers.
Learn the Rowing Stroke
The stroke has four named parts: the catch, drive, finish, and recovery. The drive moves you away from the front of the machine; the recovery brings you back for the next stroke. Concept2's rowing technique demonstration is useful alongside these instructions because you can watch the timing in motion.
Before you start, wrap your fingers around the handle with your thumbs underneath. Keep your wrists flat and your grip firm enough to hold it without squeezing hard.
- Catch: Start near the front with arms straight, shoulders relaxed, and your head in line with your torso. Lean forward slightly from your hips. Bring your shins toward upright within a comfortable range, without sliding your knees beyond that position.
- Drive: Push against the footplates, moving your seat and shoulders back together with your arms still straight. As your legs extend, lean your torso back slightly from the hips, then bend your elbows to bring the handle toward your lower ribs.
- Finish: End with extended legs, a slight backward lean, and the handle close to your body. Keep your wrists straight and shoulders down. A large backward lean adds movement you then have to reverse.
- Recovery: Send the handle away, tip forward from the hips, and slide toward the front after your hands pass your knees. Give yourself time to arrive ready for the next drive.
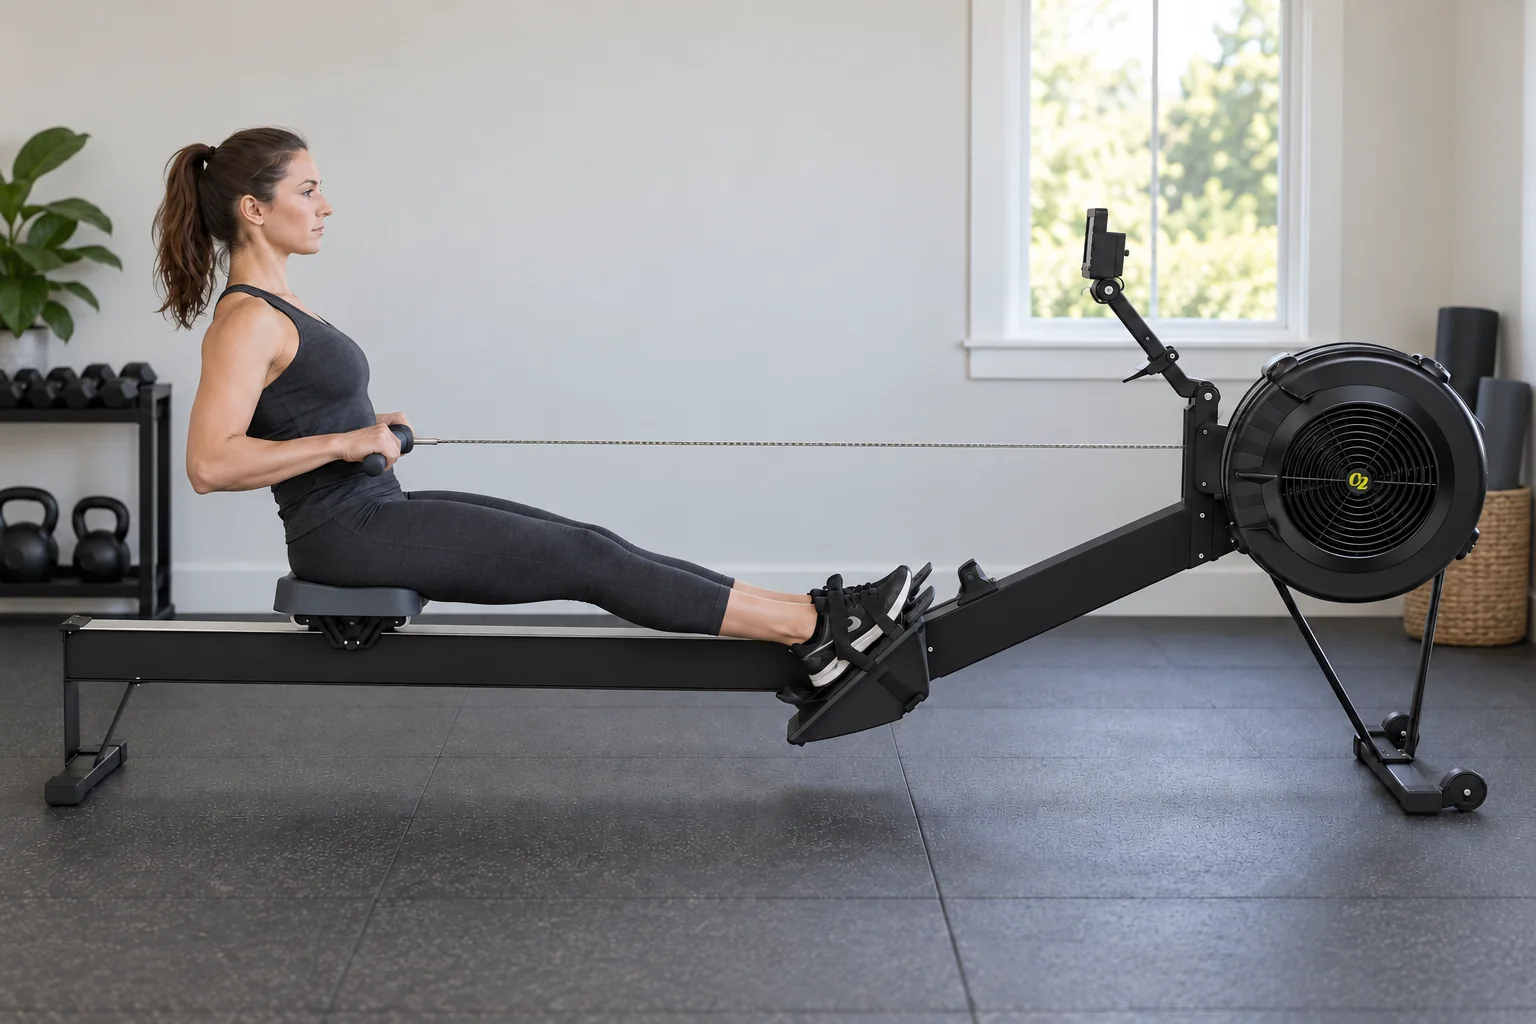
The cues legs, body, arms on the drive and arms, body, legs on the return describe the order. When you lean forward, fold at the hips while keeping your back comfortably aligned, rather than curling your shoulders toward your knees. The cues should not turn your rowing into six separate stops. Once you can follow the sequence, let the phases flow together.
I give the return as much attention as the push. If you rush forward and have to scramble into position, ease the slide until you can arrive ready to push again. A stronger pull will not fix a hurried setup for the next stroke.
Fix the Mistake You Can See
Use a side view to check your rowing machine form. If the gym allows filming, position your phone safely outside the machine's travel and record a few easy strokes, keeping other people out of the frame. A coach or instructor can also watch you and identify which part needs attention.
I recommend working on one visible error at a time. Trying to control your grip, back, knees, and screen numbers all at once makes it difficult to tell which change helped. Start with the first part of the stroke that loses its sequence.
Use the Side View to Pick One Correction
| What you notice | What to try |
|---|---|
| Elbows bend as the seat starts moving | Begin the push with long arms |
| Seat shoots back while shoulders stay forward | Move the seat and shoulders together at the start |
| Handle loops over raised knees | Send hands past knees before sliding forward |
| Torso falls far back at the finish | Keep the lean small and controlled |
| Shoulders hunch and wrists bend | Relax shoulders and straighten wrists |
These checks follow Concept2's guidance on common technique errors. They are useful cues for movement, not a diagnosis of pain. If rowing causes back pain that persists, worsens, or changes the way you move, stop the session and seek advice from a qualified healthcare professional. World Rowing recommends addressing rowing-related back pain early and adjusting training with appropriate support.
Read the Monitor Without Racing It
Start by learning the difference between stroke rate and pace. Stroke rate, often shown as SPM or s/m, counts strokes per minute. Pace, commonly displayed as time per 500 meters, describes how quickly you are covering the virtual distance. On that display, a smaller time means a faster pace.
For example, 2:30/500 m is faster than 3:00/500 m. Those are examples of how to read the screen, not targets for your first attempt. Taking more strokes each minute and covering distance faster are different measures; rushing forward can raise your stroke rate while leaving you poorly positioned to push.
On the PM5, the All Data display includes time, distance, current pace, average pace, and stroke rate. It starts recording when you begin rowing. Other consoles may use different menus or units, so check the labels before comparing numbers.
For your first technique practice, I would use the screen to notice changes rather than chase a target. If your stroke rate rises as your movement becomes rushed, ease back into a rhythm you can control.
Practice the Sequence Before Adding Intensity
Practice a few easy strokes, pause, and choose one part to improve. If the return feels tangled, try a brief pause after your arms are straight and your torso has tipped forward, with your legs still extended. From there, bend your knees and slide toward the front. Concept2 uses pause drills to help learners separate the sequence before blending it back together.
Keep this as movement practice. There is no need to complete a distance target or turn it into an interval session. Once the pause makes sense, remove it and repeat the same order smoothly. If you still cannot tell what is going wrong, a short technique check with an instructor is more useful than adding more difficult strokes.
Before adding effort, I look for a stroke you can repeat comfortably, a clear path for the handle, and a controlled return. Keep the effort easy if those parts still need your full attention; build a structured session as they become familiar. For the wider question of what rowing adds to your routine, see rowing machine benefits and limitations.
FAQs
Can your heels lift when rowing?
Yes, your heels can lift a little at the catch in Concept2's rowing technique guidance. Avoid forcing them down if that prevents a comfortable starting position, and do not use heel lift to keep sliding past that position.
How tightly should you hold the handle?
Hold the rowing-machine handle with a secure, relaxed grip. If your forearms tire early, check for excessive squeezing or an early arm pull, then ease the grip without letting go and let your legs start the drive.
Do you need a different stroke when using a rowing machine at the gym?
The stroke sequence stays the same on conventional sliding-seat cardio rowers at the gym, but reset the foot supports and check the controls for yourself. A seated cable row or chest-supported row machine is a different strength exercise with its own instructions.