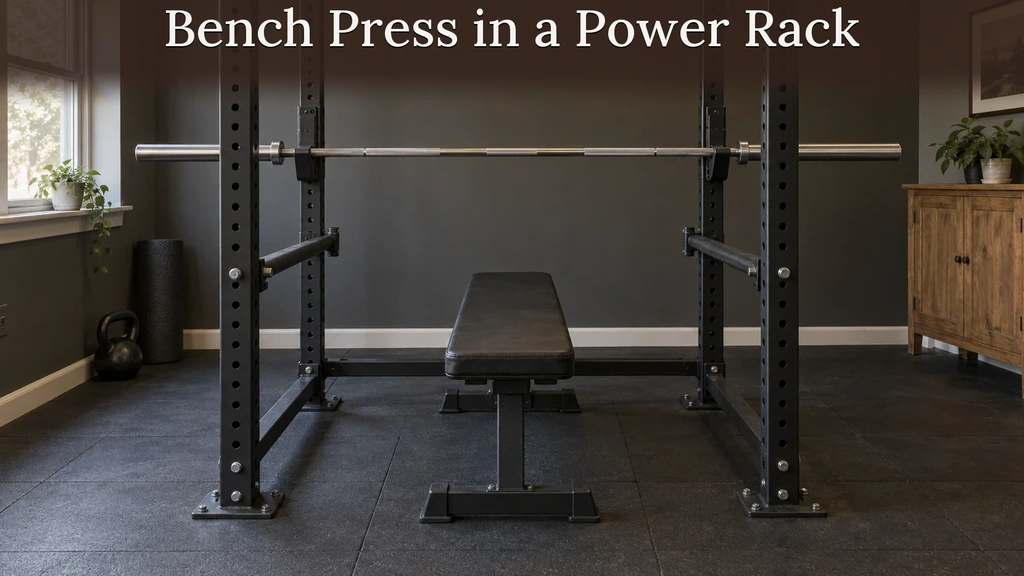
How to Bench Press in a Power Rack: Setup and Safeties

Founder
I founded HomieGym to help you make informed decisions about training at home. My background includes university-level sports science education, practical coaching, gym training and combat sports.
Equipment editor on our team: Milutin Tucakov
A power rack bench press lets you use your rack for more than squats. With a stable bench and correctly positioned safeties, the same station can support your pressing sessions and provide a place for the bar to land if you miss a lift.
I would learn the full setup before adding weight, including taking the bar out and returning it after a set. This guide walks through a conventional flat bench press, explains how to find workable support and catch positions, and shows what to rehearse with a light bar. Safeties still need to suit your body, bench, and rack.
Table of Contents
Power Rack Bench Press Setup at a Glance
Set up the complete station before your warm-up, in this order: rack, bench, J-cups, safeties, empty-bar rehearsal. The cups support the bar between sets. The safeties provide a catch surface during a missed lift. You need both jobs covered.
| Check | Ready to proceed | Stop and correct |
|---|---|---|
| Rack | Assembled and stabilized for this use | Loose hardware, movement, unknown configuration |
| Bench | Centered; every foot supported | Rocking, slipping, frame interference |
| J-cups | Matched; a short controlled lift clears the lips | Reaching shoulders forward or pressing far out of the cups |
| Safeties | Correct pair, fully secured, useful catch height | Incomplete pins, unsuitable fit, excessive drop |
| Rehearsal | Reps, supported-bar test, and rerack all work | Contact with face/neck or no clear exit |
You can use a power rack for bench pressing when its configuration, compatible safeties, and bench allow these checks. A squat rack may also work, but that name covers several designs. Look at the actual catch system and stability instructions, especially when using external spotter arms instead of safeties spanning four uprights.
Installation requirements belong to the exact rack and accessories. REP's PR-4000 manual recommends anchoring; the current builder also describes stabilizer options and configurations that still require bolting down. Check the instructions for your complete station before treating it as ready for solo lifting.
Position the Bench Before Setting the Cups
Place the flat bench lengthwise inside the rack and center its pad under the middle of the bar. All bench feet need firm, even support, with room to plant your own feet. Check that a rear crossmember or stabilizer does not force the bench away from the uprights.
Check bench dimensions before ruling out a conflict between its rear foot and the rack.

Lie down in your normal pressing position before deciding how far forward or backward the bench should sit. Position your upper back securely on the pad, place your feet where they stay supported, and take a balanced grip. Your eyes near the racked bar can be a starting reference, but a fixed eye-to-bar rule does not account for every bench, cup, arm length, or pressing position.
The final position must let you clear the J-cup lips and move the bar to a stable start over the shoulders, then lower it without striking the uprights. Starting Strength's flat-bench setup guidance treats the bench, hooks, and raised chest as parts of the same arrangement. Move the bench in small steps and rehearse rather than trying to correct a long reach while holding a loaded bar.
I give bench stability priority over convenience. If the bench rocks or slides during the empty-bar rehearsal, correct the support or use a suitable bench. A thick, compressible exercise mat beneath it can create a different problem from a firm equipment floor. Our home gym flooring guide explains the distinction between cushioning for floor exercises and support under equipment.
Also check how the bench manufacturer defines capacity. A limit may include the user's body weight as well as the external load. Keep the bench and the rack's ratings separate; one does not upgrade the other.
Set J-Cup Height for a Controlled Unrack
Set both J-cups at a height where a short, controlled press lifts the bar clear while your shoulder blades remain set on the bench. Too high forces a reach; too low adds an unnecessary press before the first repetition.

Remove the bar before relocating the cups. Match their position on both uprights, seat them fully, and engage any required retention mechanism. Replace the empty bar and test from your actual pressing posture. Check the lip clearance with both arms, rather than judging the height while standing beside the rack.
When you can clear the cups, straighten your elbows and move the bar away from the uprights into your starting position. Keep your upper back in contact with the pad. Starting Strength's written safety guide emphasizes straight elbows while transferring the bar over the face. The bar should be under control before you begin the descent.
I choose the height that preserves the setup over the one that shortens the unrack by another fraction of an inch. A small lift from a stable position is preferable to reaching out of that position. If adjacent holes leave you choosing between two poor settings, look for manufacturer-approved compatible cup options or a better-fitting station. Do not modify the cup or stack loose material under the bench.
Set the Safeties for Your Body and Bench
The safeties must let you complete your intended press and catch the bar when your chest is lowered out of the pressing position. There is no universal pin height that achieves this for everyone. Bench-pad height, chest position, body dimensions, grip, and the type of safety all affect the result.
Common options are pin-and-pipe safeties, rigid flip-down safeties, and straps. Each must match the rack and be installed as its instructions require. Straps can sag and may allow the bar to move along them; the height of their brackets alone does not establish the bar's catch position. REP's safety guide explains these different constructions.

Start with the safeties near the bottom of your intended bar path, then check their position with an empty or appropriately light bar. Check the whole protected path, including the head and neck area. Merely seeing daylight between the bar and your chest at one point does not establish a useful arrangement.
For a conventional flat press with the upper back set and chest raised, there may be enough difference between the pressing and relaxed chest positions to use a safety height between them. That is the relationship described in Starting Strength's bench setup guidance. Do not exaggerate your arch simply to make unsuitable equipment appear to fit.
Perform the Empty-Bar Test
Use an empty bar that you can control easily, or a lighter suitable training bar. Have a competent person assist while you learn this check if you are unsure. This is a controlled rehearsal, with your hands on the bar throughout; do not deliberately drop it or test a heavy failure.
Compare barbell types, including lighter technique bars, before choosing a manageable bar for the setup rehearsal.
- Take your normal position. Use the same bench location, grip, foot placement, and chest position you intend for the set.
- Rehearse the full repetition. Unrack, lower to the planned touch point, and press. Check that neither side hits a safety or upright.
- Rehearse the supported position. Lower the light bar under control onto both safeties while reducing your chest lift. Confirm that the safeties carry the bar above your relaxed torso.
- Check head and neck clearance. Confirm the supported bar can remain clear of these areas along the relevant path. Keep control of the bar; never roll it across your face or throat to test a gap.
- Check your exit. Once the bar rests securely on both safeties, confirm that you can get out without lifting it off your body, releasing an attachment, or tipping plates off one end.
- Repeat if anything changes. A moved bench, different safety, new lifter, or altered pressing position needs a fresh test.
If you cannot pass both the repetition and supported-position checks, do not load that setup. Use an approved compatible adjustment or a station that fits. A qualified coach can help evaluate the arrangement, and the manufacturer can confirm hardware options. Loose blocks, towels on pins, or improvised straps introduce new uncertainties.
An empty-bar test confirms geometry and basic operation. It does not prove loaded catch performance, material condition, or zero injury risk. Stay within the documented limits of the rack, safeties, cups, bench, bar, and installation.
Unrack, Press, and Rerack as One Sequence
Practice the finish as carefully as the first repetition. A completed press still needs a controlled rerack, and fatigue can make a familiar reach less reliable.

For a conventional flat barbell press, set your shoulder blades on the pad, keep your head and buttocks supported, plant your feet, and take a full grip with your thumbs around the bar. Choose a grip that keeps your forearms beneath the bar at a comfortable touch point on your sternum, below the shoulder line. Starting Strength's technique guide describes the raised chest, set upper back, and bar position over the shoulders at the top. Do not copy another person's grip width without checking your own movement.
- Unrack. Lift clear of both cup lips, straighten the elbows, and bring the bar to a stable start over the shoulders.
- Lower. Bring the bar under control to that chest touch point, with your wrists over your forearms and elbows beneath the bar. Avoid bouncing it off the chest.
- Press. Press up and back toward the stable top position over your shoulders. Keep the upper back set and finish the repetition before moving toward the rack.
- Rerack. With the elbows straight, guide the bar back until it contacts both cup backplates. Lower it into both cups.
- Confirm support. Check that both ends have settled before relaxing the arms or releasing the grip.
I recommend ending the set while you can still perform that entire sequence. An extra repetition that leaves you reaching diagonally for one cup is a poor trade. If the bar stops during a repetition, use the practiced controlled route to the safeties; do not turn a missed lift into a hurried attempt to find the hooks.
If you use a spotter, agree on the lift-off, start, assistance, and rerack signals before the set. Keep the safeties in place. A spotter can assist with a lift-off and a slowing repetition, but that does not make an unprotected station equivalent to a correctly arranged catch system.
Bench Pressing Alone Requires More Than Safeties
A power rack can provide a useful catch system for solo bench pressing, but good hardware does not remove the need for conservative load selection. Keep practice and ordinary training within weights you can control, and learn the setup before approaching difficult sets.
Work up through appropriate lighter warm-up sets after checking the empty-bar geometry. Watch for movement of the bench, a changing touch point, uneven contact with the cups, or a safety that was not fully secured. Stop and correct a new problem rather than assuming the original rehearsal still covers it.
Use the plate-retention arrangement required by your equipment and training setup. Do not build an escape plan around dumping plates, rolling the bar down your abdomen, or hoping someone hears you. The safeties need to receive the bar before that becomes necessary. Keep the area around the bench clear enough for the exit you practiced.
I reserve maximum attempts and unfamiliar variations for a better-supported situation with competent help. A rack's presence alone is insufficient reason to train to failure. For a home session, leaving a controlled repetition available also leaves a more reliable finish.
Fix Common Rack Bench Problems Before Adding Weight
When the bench press setup feels awkward, identify which part of the sequence fails: getting the bar out, performing the repetition, reaching the catch position, or returning it. Moving several components at once makes the cause harder to find.
| Problem | Check first | Next action |
|---|---|---|
| Shoulders lift off the pad to unrack | Cups too high; bench too far away | Lower cups or reposition bench, then retest |
| Bar hits uprights during reps | Bench position and bar path | Reposition with an empty bar; get technique help if needed |
| Safeties interrupt chest contact | Safety height and actual pressing position | Retest both working and catch positions |
| Lower safety setting leaves bar on body | Hole spacing and complete equipment fit | Use an approved alternative setup |
| Bench rocks or creeps | Feet, floor, bench condition, installation | Correct support before lifting |
| One end misses its cup | Cup alignment and rerack control | Reduce load and rehearse the finish |
Repeat the full safety test after the correction, even if the change seems small. Moving the bench to clear an upright also changes where your body sits above the safeties.
Incline Presses and Other Changes Need a Fresh Setup
An incline bench press changes the body's position and bar path, so flat-bench settings do not automatically transfer. The backrest, seat, frame, and bench feet must all fit within the rack at the chosen angle, with the bench locked as its manual directs.
Repeat the bench adjustment checks before testing that new rack position.
Move the empty bench into place, check the support and cup reach, then repeat the full light-bar rehearsal and supported-position test. Inspect where the bar would rest relative to the sloping torso, head, and neck. Check clearance at the actual points the bar could contact, rather than using the flat bench's recorded hole numbers.
I keep separate settings for each established variation, including the bench, grip and safety system. Those notes identify the setup to rehearse when another lifter or a new piece of equipment changes the station.
Make the First Loaded Session Easy to Repeat
After the station passes the light-bar checks, warm up gradually and use a load that lets you finish each repetition and rerack deliberately. Record the bench position, J-cup holes, safety settings, and variation. Those notes make the next setup easier to reproduce.
The beginner barbell workout places that press alongside a squat, hinge and row.
My recommendation is to keep the first session ordinary. You are establishing a reliable place to train, with a catch arrangement you understand. Increase the load only while the setup and technique stay dependable; correct equipment fit or movement problems before asking the station to handle a harder set.
FAQs
Can you bench in a power rack?
Yes, you can bench in a power rack when the bench fits, the rack is stabilized as required, and compatible safeties pass the light-bar setup test. Check the complete arrangement, including cup reach and face and neck clearance.
Can a squat rack be used for bench press?
A squat rack can support bench pressing when its design, stability requirements and suitable safeties permit that use. Check the actual setup rather than its name, since open stands and half racks may require specific external arms and installation conditions.
How high should bench press safeties be?
Bench press safeties should clear the intended repetition and support the bar above your relaxed body in the tested catch position. Choose the setting with a light-bar rehearsal instead of a fixed gap or hole number, and recheck after changing the bench or pressing position.
Do you still need a spotter in a power rack?
You can bench alone in a properly configured power rack, but I recommend competent help for learning, lift-offs and difficult sets. Spotters and catches serve different roles, so keep the safeties installed and agree on assistance signals before the set.
Are straps better than pins for bench pressing?
Straps can be useful for bench pressing when they fit the rack and provide a checked catch position, but they are not automatically better than pins. Choose the compatible system that passes your full rehearsal within manufacturer limits, accounting for strap sag and possible bar movement.
This guide covers general equipment setup for a conventional flat barbell bench press. Follow the instructions and limits for your equipment, learn unfamiliar movements with a qualified coach, and seek individual advice for pain, injury, or a medical condition.