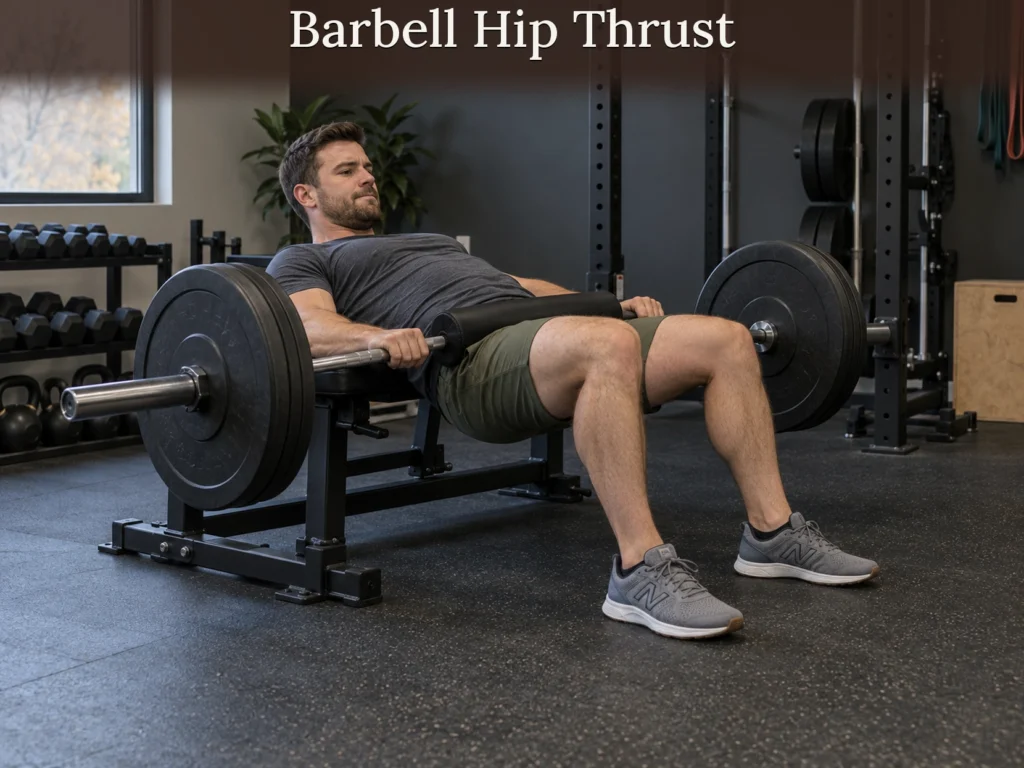
Barbell Hip Thrust: Setup, Technique, and Progression

Founder
I founded HomieGym to help you make informed decisions about training at home. My background includes university-level sports science education, practical coaching, gym training and combat sports.
The barbell hip thrust trains hip extension by raising your hips with your upper back supported and a padded bar across your hip crease. Start by making the setup manageable: a stable support, enough room to get under the bar, and a load you can lower without help. I put that entry and exit ahead of the weight on the bar, because a strong repetition does little for you if you cannot get into position comfortably or finish the set under control.
Once those pieces work, plant your feet, brace your trunk, lift through your hips, and lower along the same path. If the bench or bar gets in the way of learning that movement, a floor bridge or manageable dumbbell gives you a simpler starting point.
Table of Contents
Set Up the Bench, Bar and Padding for Hip Thrusts
Set up a barbell hip thrust with a support intended for the exercise, centered padding, and a bar you can move into and out of position with a light load. Check the support's instructions for its permitted use, loading and any anchoring requirements. A bench that feels stable when you sit on it may still slide or tip when you press back against its edge. An ordinary chair, couch or loose stack of pads is not an interchangeable lifting station.
Place the support on a firm, level, nonslip surface. Keep the area around both ends of the bar clear so you can load it evenly and move away after the set. Sit in front of the support and check that its padded edge can support your upper back, around the lower part of your shoulder blades, without pushing into your neck. Your body proportions and the support's height determine whether that position works.
- Rehearse without the bar. Put your upper back against the padding, plant both feet and lift your hips. The support should remain still as you move. Lower yourself back down before checking or changing the setup.
- Position the padding. Fit a suitable bar pad securely around the center of the shaft. It should cushion the bar at your hip crease without slipping toward your abdomen or making the bar hard to control.
- Load both sides evenly. With the bar stable on the floor, add matching plates in small, alternating additions and secure them with collars compatible with the bar. Keep hands clear of the places where plates meet the floor.
- Check clearance before getting underneath. Sit with your legs extended and see whether the manageable bar-and-plate setup can roll over your legs into the hip crease without trapping you or scraping your knees. Do not add heavy plates merely to gain clearance.
- Practice the entire return. With a light setup, bring the bar into place, perform a controlled repetition, lower until the plates are supported on the floor, then guide the bar away along your legs. Confirm that the padding and plate clearance allow both directions.
How to Do a Barbell Hip Thrust
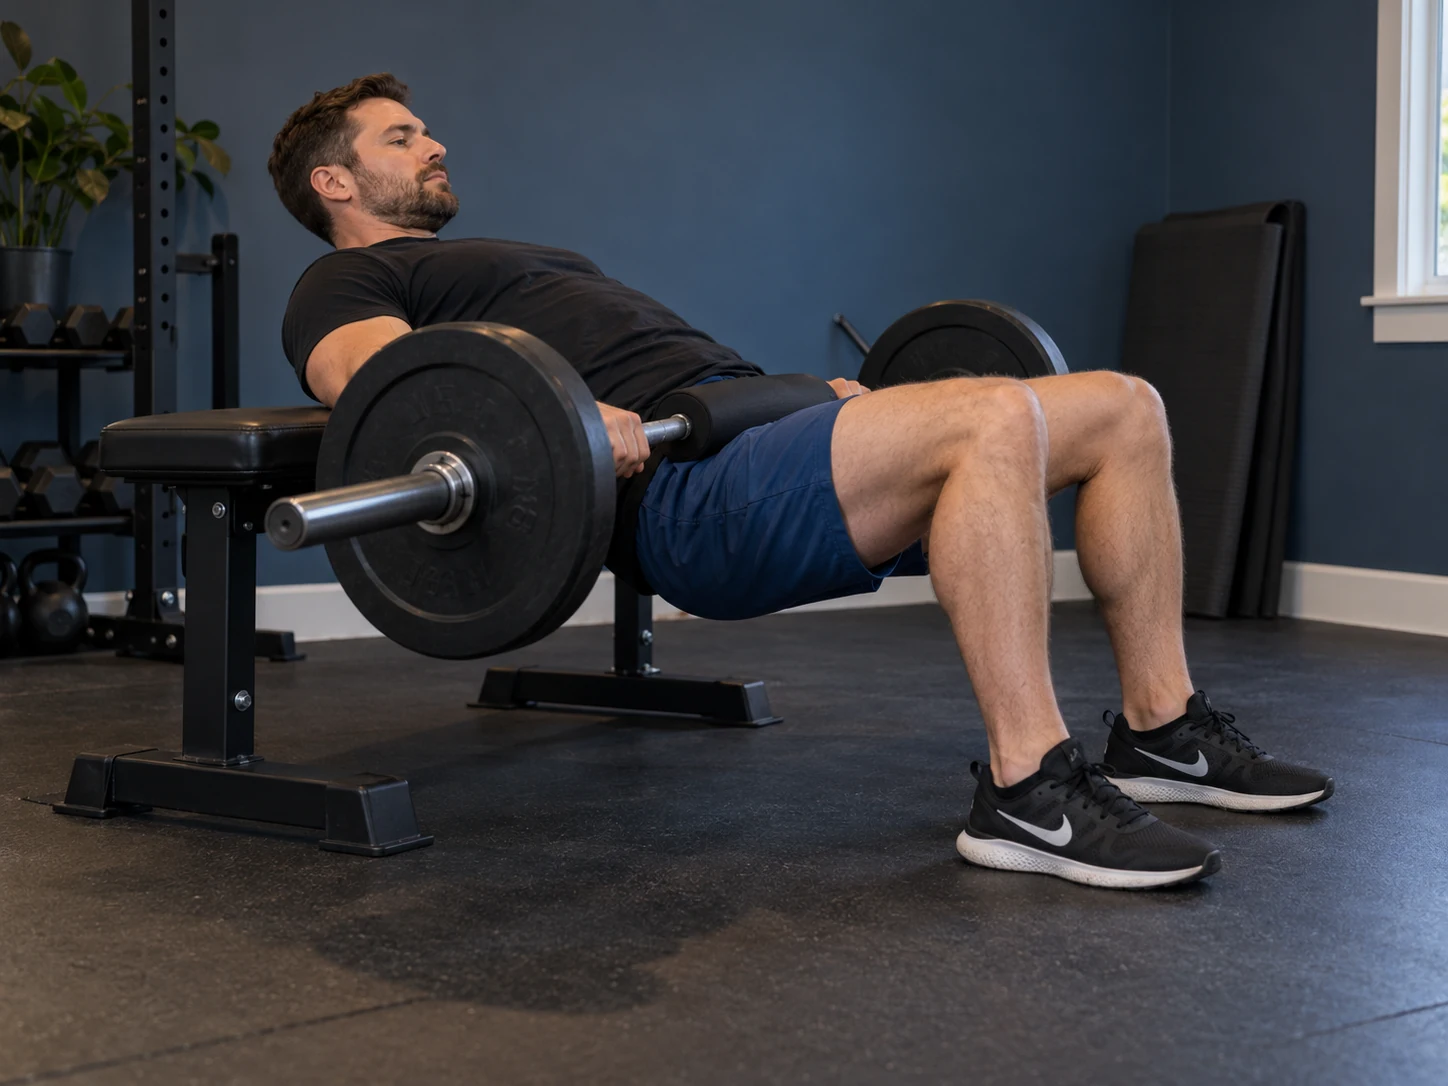
Keep your upper back supported, your feet planted and the bar centered while your hips rise and lower. Your hands steady the bar against the pad; they do not pull it upward. Use the same controlled range from the first repetition to the last.
Find Your Foot Position
Begin with feet roughly hip to shoulder width apart and toes turned out as much as feels natural. Lift your hips without load and check your position near the top. Approximately upright shins are a useful starting reference, rather than an angle you must force. Keep contact through the heel and the bases of the big and little toes so you can press through the whole foot.
Move your feet a little closer or farther away between practice repetitions until you can lift and lower without the heels peeling up or the feet sliding. Let your knees follow the direction of your toes. If you need to reposition your feet during a loaded set, lower and return the bar first. Shuffling under a raised bar makes it harder to keep both sides moving together.
Lift, Pause and Lower Under Control
Take a breath and brace, meaning gently firm the muscles around your trunk so your rib cage and pelvis move with control. Keep your head comfortable and follow the movement rather than throwing your head backward. Drive through both feet and raise your hips while your upper back stays in contact with the support.
Finish when your hips reach a comfortable extended position and your trunk and thighs are approximately aligned. A normal curve in your lower back is fine. Avoid chasing extra bar height by pushing your ribs upward and leaning farther back after your hips have finished extending. Pause briefly to check that both hips are level, then lower without bouncing. The pause helps you control the finish; squeezing harder or holding longer is not a requirement for a successful repetition.
Return the Bar Before Moving Away
Finish the set before your repetitions become difficult to control. Lower your hips and let the plates settle fully onto the floor while keeping the bar steady. Once the floor supports the load, ease your upper back away from the bench, extend your legs as needed for the clearance you rehearsed, and guide the bar toward your feet before moving away. Keep your fingers out from underneath the plates.
If a repetition stalls, lower along the same path to the supported starting position. Do not twist out from beneath a raised bar or try to rescue the repetition by sharply arching your back. If the bar cannot return to the floor without pinning your body, that setup needs changing before another set. Stop for sharp or increasing pain, numbness, dizziness, or loss of control; persistent symptoms need appropriate professional assessment.
Fix Sliding, Uneven Lockouts and Short Repetitions
When the support moves, the bar tilts or your range shrinks, end the set and change the setup or load before trying again. More effort will not secure a sliding bench. Use the visible problem to choose one adjustment, then check it with an easier practice set.
| What You Notice | What to Check | Next Attempt |
|---|---|---|
| Bench slides or tips | Permitted use, floor contact, required securing | Correct the support or choose a floor bridge |
| Feet slide or heels lift | Foot placement and floor grip | Reposition feet with the bar down |
| One side finishes higher | Bar center, matching plates, stance | Reduce load and repeat evenly |
| Later reps stop short | Fatigue and load | End earlier or use less weight |
| Finish comes from the lower back | Rib position and intended endpoint | Practice a lower, controlled finish |
| Bar pressure is painful | Pad security and hip-crease placement | Reset or use a comfortable alternative |
An uneven repetition does not identify a particular weak muscle or injury. First remove simple setup differences you can see. If the movement remains painful or consistently uneven with a manageable load, stop rather than trying to diagnose it by adding more cues. A qualified coach can assess the actual movement, and a clinician can assess persistent symptoms.
What the Hip Thrust Trains, and What It Leaves Out
The hip thrust emphasizes the gluteus maximus, the large buttock muscle that helps extend your hip. Other muscles assist and steady the movement, but their involvement does not mean the lift develops every part of your lower body equally.
A nine-week study of novice lifters found similar measured gluteus maximus growth after hip thrust or back squat training. Quadriceps and adductor growth favored squats, while the gluteus medius and minimus and the hamstrings showed little to no growth. Those findings concern the measured muscle regions in a short novice trial, rather than a universal ranking of exercises. (1)
I recommend the barbell hip thrust for glutes when the program needs focused hip-extension work. A squat and a suitable hip hinge serve different lower-body tasks. A hip hinge means bending mainly at the hips while controlling your trunk. The hip thrust alone does not supply a complete leg program. For exercise order and a whole session, use the barbell leg workout guide and fit this lift into that plan rather than adding a second full routine.
Choose a Starting Load You Can Control Through Every Rep
Choose your starting load by what you can position, lift and return with the same range on every repetition. Begin with bodyweight practice. Add a manageable dumbbell or light training bar only when it improves the challenge without making entry, exit or balance difficult. An empty full-size bar can already be too heavy for learning.
For a lift-specific starting example, try two working sets of 8 to 12 repetitions, resting about two minutes between them. A working set is a planned, challenging set after your easier practice sets. Finish with about two or three controlled repetitions in reserve, meaning you estimate that you could complete that many more repetitions with the same technique. Leave more margin while learning. This is an editorial starting example to fit within your existing training, not a complete workout or a scientifically established ideal dose.
The 2026 American College of Sports Medicine overview supports progressive resistance training for strength and muscle growth in healthy adults. Training to momentary muscle failure did not consistently improve outcomes across the included reviews, so a failed repetition is unnecessary as a progress test. (2) Your sets should still become challenging as you gain control.
- Keep a log of the total bar-plus-plate load, repetitions and any setup changes.
- Add repetitions within the range while preserving your controlled range and intended effort.
- Once every working set reaches 12 repeatable repetitions with the intended margin, consider the smallest practical load increase.
- After increasing, return toward eight repetitions and build again. If the smallest jump disrupts technique or handling, keep the previous load.
A single difficult session does not automatically call for a deload, which is a temporary reduction in training demand. If performance or control repeatedly worsens, reassess the weight, number of sets, other leg training and recovery before adding work.
When a Floor Bridge or Dumbbell Is the Better Starting Point
Choose a floor bridge when you cannot arrange reliable upper-back support or comfortable bar clearance. Choose a manageable dumbbell when the hip-thrust position works but handling a long bar is the limiting task. Either option lets you practice without forcing equipment you cannot yet control.
| Starting Point | How It Helps | What Changes |
|---|---|---|
| Bodyweight floor bridge | Removes bench and bar handling | Upper back stays on the floor; range differs |
| Dumbbell hip thrust | A smaller load can be easier to position | Still needs suitable support and secure handling |
| Light barbell hip thrust | Practices the intended bar setup | Needs usable plate clearance and a rehearsed return |
For the floor bridge, lie on your back with knees bent and feet planted, then raise your hips to a comfortable finish and lower them to the floor. Keep the same whole-foot contact and controlled trunk position described above. Begin without weight so you can learn the movement and get up easily afterward.
For a dumbbell hip thrust, use the same suitable upper-back support and place a manageable dumbbell securely across the hip crease with appropriate cushioning. Hold it steady throughout the set and lower before moving it away. If you cannot place or remove it with control, return to bodyweight practice. Move to a barbell when its loading options become useful and you can manage the whole setup.
FAQs
Can I hip thrust without a bench?
Yes, you can use a floor bridge when you do not have suitable elevated upper-back support. Your upper back stays on the floor, so the support position and available range differ from a bench hip thrust.
Do I need a barbell pad?
A secure, suitable barbell pad is useful when direct bar pressure makes hip thrusts uncomfortable. It should stay centered at the hip crease; padding cannot compensate for excessive load or an unstable support.
Why does the bar or bench move during the set?
The bar or bench may move because the support is unsuitable or unsecured, your feet slip, or the bar is off-center. End the set, return the bar to the floor, and check the setup with a lighter load before continuing.
This guide provides general exercise education for healthy adults, not individualized medical advice or treatment. If an injury or ongoing symptoms affect your training, seek guidance from an appropriate healthcare professional.
References
- Plotkin DL, Rodas MA, Vigotsky AD, et al. Hip thrust and back squat training elicit similar gluteus muscle hypertrophy and transfer similarly to the deadlift. Front Physiol. 2023;14:1279170. doi:10.3389/fphys.2023.1279170
- Currier BS, D'Souza AC, Fiatarone Singh MA, et al. American College of Sports Medicine position stand. Resistance training prescription for muscle function, hypertrophy, and physical performance in healthy adults: an overview of reviews. Med Sci Sports Exerc. 2026;58(4):851-872. doi:10.1249/MSS.0000000000003897