
Power Rack Exercises: Setup and a Practical Home Routine

Founder
I founded HomieGym to help you make informed decisions about training at home. My background includes university-level sports science education, practical coaching, gym training and combat sports.
Equipment editor on our team: Milutin Tucakov
Power rack exercises can cover squats, presses, pull-ups, and rows, with deadlifts and other floor work alongside the rack. For a beginner home routine, I recommend learning a small group of these movements and repeating them, rather than changing exercises every session. A usable setup and a clear progression matter more than the number of attachments on the frame.
You will need a suitable barbell, plates, and safeties for the barbell exercises, plus a stable bench for bench pressing. Below, I explain how to adjust the rack, which exercises deserve a place in the routine, and how to organize two weekly sessions without turning every workout into an equipment changeover.
Table of Contents
Power Rack Exercises and the Equipment They Need
A basic power rack gives you an adjustable place to support and catch a barbell. An installed pull-up bar adds a different movement. The rack itself supplies no adjustable resistance, so the exercises you can perform depend on the bar, plates, bench, and attachments you actually own.
| Exercise | What you need | Main setup check |
|---|---|---|
| Back squat | Bar, plates, J-cups, safeties | Clear the safeties at your normal depth |
| Bench press | Bar, plates, bench, J-cups, safeties | Verify the catch position with an empty bar |
| Standing overhead press | Bar, plates, suitable rack position | Clear the rack and ceiling at lockout |
| Pull-up or chin-up | Approved, installed pull-up bar | Body and head clearance; rack stability |
| Barbell row | Bar, plates, clear floor area | Space for the hinge and bar path |
| Deadlift | Bar, plates, suitable floor area | No contact with rack feet or crossmembers |
| Dips or band work | Compatible attachment or approved anchor | Attachment instructions and loading direction |
I separate what the rack makes possible from what deserves a place in your next workout. A novice does not need to squat, bench, overhead press, deadlift, row, and do dips in every session. Choose enough movements to train the legs, hips, pushing muscles, and pulling muscles, then give yourself time to learn them.
If you are still assembling the room, the home gym essentials guide explains how to plan equipment around usable training space. Include the bench and loaded bar in that plan; fitting the empty rack against a wall is only the starting point.
How to Adjust a Power Rack Before Training
Adjust the J-cups, which hold the bar between sets, and the safeties, which receive it below your working position. Unload and remove the bar before moving either component. On a normal fixed-height rack, these adjustments change the bar's starting and catch positions; they do not change the frame's overall height.

- Check the rack first. Follow its assembly and anchoring instructions, inspect hardware and attachment locks, and clear loose plates from the working area.
- Match both sides. Fit the J-cups at corresponding holes, with both fully seated and retained as instructed. Check the actual position as well as the printed numbers.
- Install the safeties. Use the correct size and type for the rack. Engage every required pin, latch, or bracket.
- Test the movement unloaded. Confirm that you can take the bar out, perform the movement, and return it without tiptoeing, hitting the frame, or losing your position.
- Write the settings down. Keep separate J-cup and safety settings for each exercise and each person.
Manufacturer instructions can change with the rack configuration. For example, REP's current PR-4000 builder describes particular stabilizer options and still requires bolting down for certain attachments. Do not transfer a stability allowance from one configuration to another.
After moving the bench, changing shoes, or switching exercises, repeat the relevant check. I prefer recorded settings followed by a quick physical test; a number in your training log cannot tell you that a pin failed to seat today.
How to Use a Power Rack for Squats
For a back squat, set the J-cups so you can lift the bar clear by straightening your legs from a small knee bend. You should not need to stand on your toes or perform a deep squat just to unrack. Set both safeties below the bar's lowest position during your intended squat.
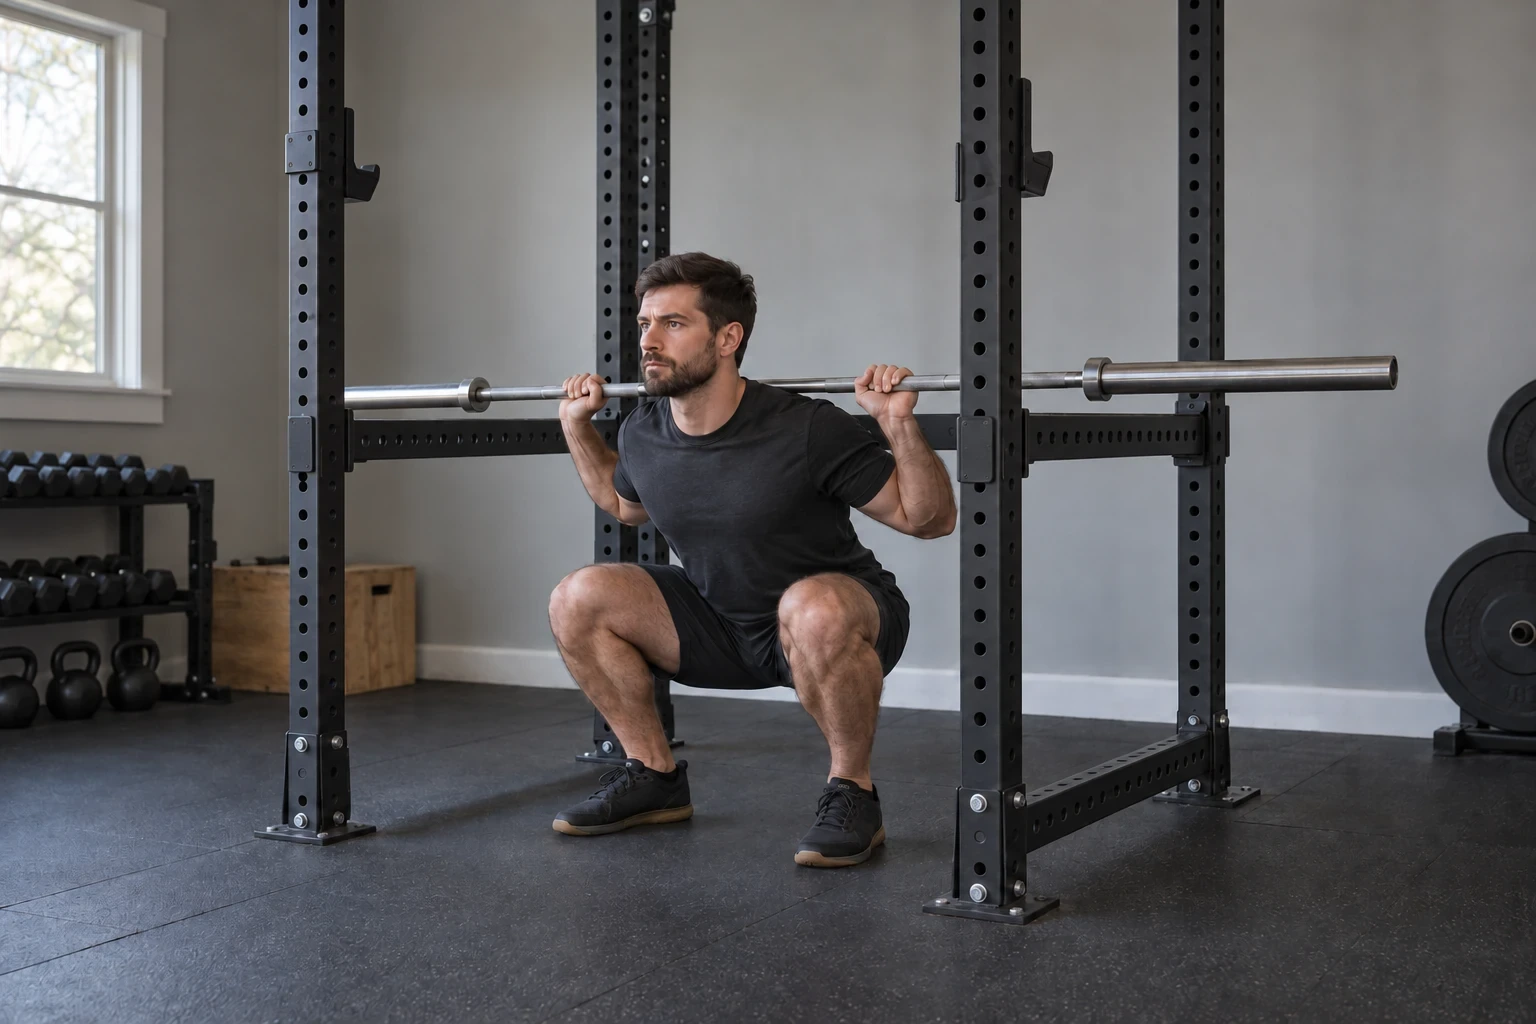
Practice the whole sequence with a bar you can control. Center it in the cups, take a balanced grip, position it securely on your upper back, and stand up before stepping back. Use only the steps needed to establish your stance inside the catch area. A long walkout brings you closer to the rear of the rack without improving the squat.
Squat to the depth you can control while maintaining your balance and chosen technique. Check that neither end of the bar contacts a safety during an ordinary repetition. The catch position should remain close enough to receive a failed lift without requiring a large additional descent. Starting Strength's safety guidance describes setting this relationship to the lifter's bottom position, rather than using a universal hole number.
Learn how to lower a missed squat onto the safeties with a qualified coach before you need that skill under a heavy bar. A written cue to throw the bar backward is inadequate, especially because different bar positions change what happens during a miss. The goal of this first session is to make the unrack, squat, catch arrangement, and rerack familiar.
To rerack a completed set, stand up fully, walk forward under control until the bar meets both cup backplates, then bend your knees to lower it into both cups. Confirm both ends are supported before releasing your grip.
Bench Presses and Overhead Presses
Bench pressing and overhead pressing train different pushing directions, and each needs its own setup. I alternate them in the routine below to keep the amount of new work manageable while making room for pulling exercises.
Bench Press Inside the Rack

Put a stable flat bench lengthwise inside the rack, centered under the bar. Adjust the cups for an unrack that preserves your upper-back position. Set and test the safeties for the bench press separately from the squat. They must allow the planned repetition and receive the bar when you lower your chest out of your pressing position.
The complete check includes your face and neck clearance and a way to get out after the bar is supported. Starting Strength's bench setup guidance explains the relationship between a raised pressing chest and the lower relaxed position. If the equipment cannot provide both working clearance and a useful catch position, choose another pressing setup before adding weight.
For the repetition, set your upper back on the pad, keep your head and buttocks supported, and plant your feet. Take a full grip with your thumbs around the bar. Unrack to a stable position over your shoulders, lower under control to a comfortable point on your sternum, then press back toward that starting position without bouncing. Keep your forearms beneath the bar. Finish with straight elbows before guiding the bar to both cup backplates and lowering it into the cups. Starting Strength describes these grip, touch-point and top-position checkpoints.
Standing Overhead Press
For an overhead press, take the bar from a suitable upper-chest starting height and establish your stance where the bar has a clear route overhead. Check the top crossmembers, pull-up bar, ceiling, and light fittings. A rack can fit the room while a loaded overhead press does not.
Use a grip and starting position you can control, keep the bar close as it passes your face, and finish balanced with the bar overhead. Lower it under control to the starting position. I favor a lighter practice load over forcing a standing press into low clearance. If the room prevents the movement, use the bench press in both sessions for now, or choose an appropriate alternative with coaching.
Pull-Ups, Rows, and Deadlifts
Use a pull-up or chin-up for vertical pulling, a row for horizontal pulling, and a deadlift or Romanian deadlift for the hip hinge. They are separate movements, even though all may appear in a list of power rack exercises.
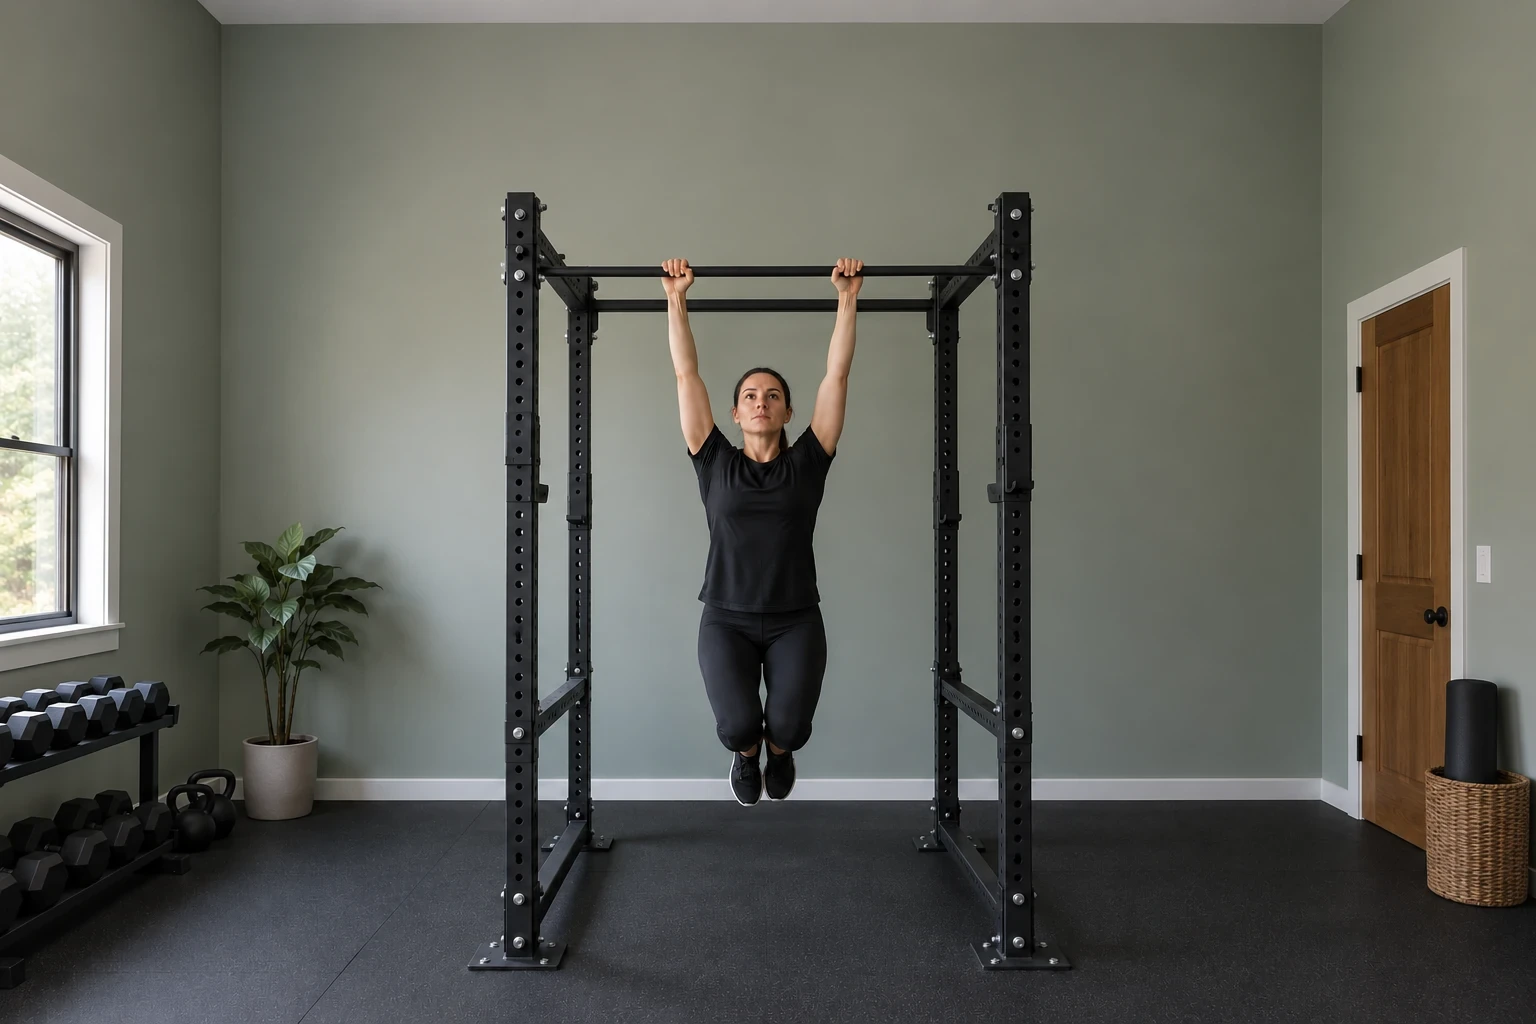
You can do pull-ups in a power rack when it has a suitable installed bar, the configuration is stable for that use, and there is room for your body and head. Start with controlled repetitions. Do not assume permission for strict pull-ups includes swinging or kipping. Those movements need their own clearance and installation allowances.
Use an overhand grip for a pull-up, or turn your palms toward you for a chin-up, with your thumbs wrapped around the bar. Brace your trunk and pull your elbows down to raise your body without swinging. Bring your chin to bar level without craning your neck, then lower slowly until your arms extend again. ACE describes this controlled ascent and return for both variations,. Use a range you can perform comfortably.
If one full repetition is beyond you, avoid building the routine around repeated failed attempts. Use a controlled row variation you can repeat, or an assisted pull-up arrangement approved for the equipment. I treat assistance as a way to practice a complete movement, rather than a reason to swing into a repetition you cannot control.
For a barbell row, take the light bar from suitable supports and stand with a slight knee bend. Hinge at your hips and brace your trunk, letting the bar hang beneath your shoulders. Pull toward your abdomen while keeping your torso steady, then lower slowly until your elbows straighten. Avoid standing up to heave the bar through the repetition. ACE describes the hinged position, pull toward the belly and controlled return. If maintaining that position takes attention away from the pull, a supported dumbbell row is another option; our dumbbell back exercises guide covers supported choices. The alternative must fit the equipment you own.
You do not need to deadlift inside the rack. A clear floor area beside or in front of it often gives you more room. Check the bar, plates, feet, and rack base through the full movement. A rack pull starts from raised supports; it is a different exercise, and those supports must be approved for that use. A conventional deadlift starts from the floor.
Check bar and plate clearance before choosing the floor area for those pulls.
The Romanian deadlift in the routine below begins standing with the bar in your hands. With a small knee bend, push your hips back and lower the bar close to your legs, then extend your hips to stand again. Stop the descent before your back position changes; reaching the floor is not the goal. Catalyst Athletics describes this top-down hinge and the limit set by maintaining back position. Learn how to take and return the light bar from suitable supports before performing working sets.
A Practical Two-Day Power Rack Routine
For a healthy adult beginner who can perform the chosen movements comfortably, I suggest two full-body sessions on nonconsecutive days, such as Monday and Thursday. This is an example starting routine for learning and building consistency, with conservative working loads. It is not a personalized rehabilitation or competition program.
The American College of Sports Medicine's 2026 guidance recommends training the major muscle groups at least twice weekly and building gradually. It also reports that training to momentary muscle failure is unnecessary for many average healthy adults. The exact exercise order and repetition ranges below are my practical example, rather than an ACSM rack workout.
Follow one session column from top to bottom, completing both working sets of an exercise before moving to the next row. Perform Session A on the first training day and Session B on the next.
| Session A | Session B | Sets and reps | Rest |
|---|---|---|---|
| Back squat | Back squat | 2 x 6 to 8 | 2 to 3 minutes |
| Flat bench press | Standing overhead press* | 2 x 6 to 8 | 2 to 3 minutes |
| Barbell row | Pull-up or chin-up** | 2 x 6 to 10 | About 2 minutes |
| Romanian deadlift | Romanian deadlift | 2 x 8 to 10 | 2 to 3 minutes |
*If overhead clearance or the movement is unsuitable, repeat the flat bench press with its checked setup. **If six controlled pull-ups are beyond you, use a suitable assisted version or repeat the row. Do not add unfamiliar equipment just to complete a table. A coach can help select a substitute when the movement itself is uncomfortable.
Here, 2 x 6 to 8 means two working sets of six to eight repetitions at the same load. It excludes warm-up sets. Rest until you can begin the next set with control and normal readiness; take longer than the listed range if necessary, rather than rushing because a timer has finished.
Before the first working set of each exercise, practice with an empty or lighter bar, then add manageable warm-up steps toward the day's load. A standard Olympic bar can already be too heavy for a new lifter. Use a lighter suitable bar when needed, and learn the movement before chasing a prescribed load.
The barbell types guide includes lighter technique bars when the usual empty bar is too heavy for controlled practice.
Choose working weights that leave roughly two or three controlled repetitions available at the end of the set. This is called repetitions in reserve. Beginners may misjudge it, so also watch for a shortened movement, a changing bar path, or a repetition that requires a different technique. End the set before those become your method of completing the target.
How to Progress Without Testing Your Maximum
Keep the load steady until you can complete the top of the repetition range in both sets with the same controlled technique. Then add the smallest practical load increase and return toward the lower end of the range. This gives you a progression rule without needing a one-repetition maximum test.
For example, suppose your bench press progresses from 8 and 6 repetitions to 8 and 8 at the same weight. If both sets still leave some capacity in reserve, add the smallest balanced plate increase next time. Count the increase on both ends of the bar. Two 1.25 lb plates add 2.5 lb total; two 2.5 lb plates add 5 lb.
I prefer repeating a manageable load when the smallest available jump causes technique to change. Completing the range is useful information, but it is not a deadline to add weight. The size of the jump matters more on a light overhead press than on a heavier lower-body movement.
- One difficult session: repeat the load after checking rest, technique, and recovery.
- Repeated missed targets: reduce the load enough to regain control and review the plan before pushing harder.
- Pain or unexpected symptoms: stop the provoking exercise and get appropriate advice instead of treating it as a progression problem.
Log the exercise, working load, repetitions in each set, and rack settings. Progress means doing more comparable work; changing depth, assistance, or technique makes the numbers harder to compare.
Check Attachments Before Adding Dips, Rings, or Bands
Add dips, rings, or bands when they solve a specific gap in the routine and the rack is approved for the arrangement. A matching hole size alone does not establish compatibility. For example, REP's Dip Attachment 2.0 has a defined upright and mounting specification and uses a retaining pin.
For rack dips, follow the attachment's mounting and stability instructions, test the hold without added weight, and use a controlled range you can manage. Anchor bands only to suitable designated points, away from sharp edges. Skip improvised ring-dip and band arrangements when the manufacturer has not confirmed the rack and loading direction.
What to Do in Your First Session
Start by checking the rack and practicing the chosen movements with light equipment. Record the J-cup and safety positions, then try Session A at an easy enough load to keep every repetition controlled. Leave with usable notes and energy for the next session.
I recommend repeating this small routine before changing its exercises. If you can set up reliably, complete the movements comfortably, and make gradual progress, the rack is doing its job. Let a specific limitation decide the next addition, such as assistance for vertical pulling or smaller plates for an upper-body lift.
FAQs
Can you gain muscle using only a power rack?
A power rack with suitable resistance equipment can support muscle-building training across much of the body, while an empty rack offers only limited bodyweight options. The bar, plates, bench and exercise choices determine coverage, and training, food intake and recovery affect the result.
How do you adjust power rack height?
On most fixed power racks, adjust the J-cups and safeties rather than the frame height, unless the manufacturer designed the frame to adjust. Remove the bar, relocate and secure the attachments as the manual directs, then test the movement unloaded.
Should you deadlift inside a power rack at home?
You can deadlift inside a power rack when its floor area and frame allow an unobstructed movement, but the rack is unnecessary for the exercise. Choose suitable flooring and enough room for the bar and plates without contact with low crossmembers or rack feet.
Can you do ring dips on a half rack?
Ring dips on a half rack require manufacturer approval for the suspension points, loading direction and complete configuration. Choose an established alternative when approval is unknown rather than inferring it from barbell capacity.
Is two days a week enough to start?
Two nonconsecutive weekly sessions can be a useful starting schedule for a healthy beginner learning this routine, with repeated practice and days between sessions. Adjust the plan to progress and recovery rather than treating two days as the right long-term dose for every goal.
This guide provides general exercise and equipment information. Learn unfamiliar lifts with a qualified coach, follow your equipment's instructions, and seek individual advice for pain, injury, or a medical condition.