
Pilates Reformer Exercises: A Beginner Guide for Home

Founder
I founded HomieGym to help you make informed decisions about training at home. My background includes university-level sports science education, practical coaching, gym training and combat sports.
Equipment editor on our team: Milutin Tucakov
Pilates reformer exercises give you several ways to work your legs, arms, and trunk on one machine, and you can begin with a small selection. A first session can focus on supported movements and a comfortable rhythm before you explore more demanding variations.
I favor learning a few exercises well enough to understand what each one is asking you to do. This guide explains six options and brings four of them together in a short beginner routine. Use it alongside instruction to follow a class or review movements you have been taught, with the supervision your machine requires.
Table of Contents
Pilates Reformer Exercises to Start With
Begin with footwork and supported arm work, then add a breathing exercise and a comfortable seated stretch. Pelvic lift and pulling straps give you further options once an instructor has shown you their setup. The table separates those choices so you can build a session that fits your current skills.
| Exercise | Main task | Before you try it |
|---|---|---|
| Footwork | Leg movement with a steady pelvis | Learn footbar and spring setup |
| Supine arms | Arm movement without lifting the ribs | Learn loop grip and rope tension |
| Hundred prep | Coordinate arm pulses and breathing | Choose a comfortable head and leg position |
| Mermaid | Controlled seated side bending | Find a comfortable seated position |
| Low pelvic lift | Small hip lift with controlled leg travel | Learn the low-lift variation in person |
| Pulling straps | Arm pull with a modest chest lift | Use a suitable long box and taught setup |
A reformer is a Pilates machine with a sliding padded platform, called the carriage, connected to springs. The footbar and rope loops give you places to push or pull from. In a Pilates reformer workout, you change body position and spring settings between exercises; the same machine can support a movement or make it more demanding.
I keep the first session focused on a few familiar movements. A long list of Pilates reformer moves is useful for learning your options, but adding every variation makes it harder to remember the setup that belongs to each one.
How to Use a Pilates Reformer Before You Exercise
To learn how to use a Pilates reformer, first have an instructor show you how to get on and off, secure the footbar, attach the springs, and handle the loops. Balanced Body recommends introductory instruction before home practice. Its Reformer Usage Safety Guide requires supervision by a trained Pilates instructor. Check your own model's manual for its requirements; a written guide cannot check your setup while you move.
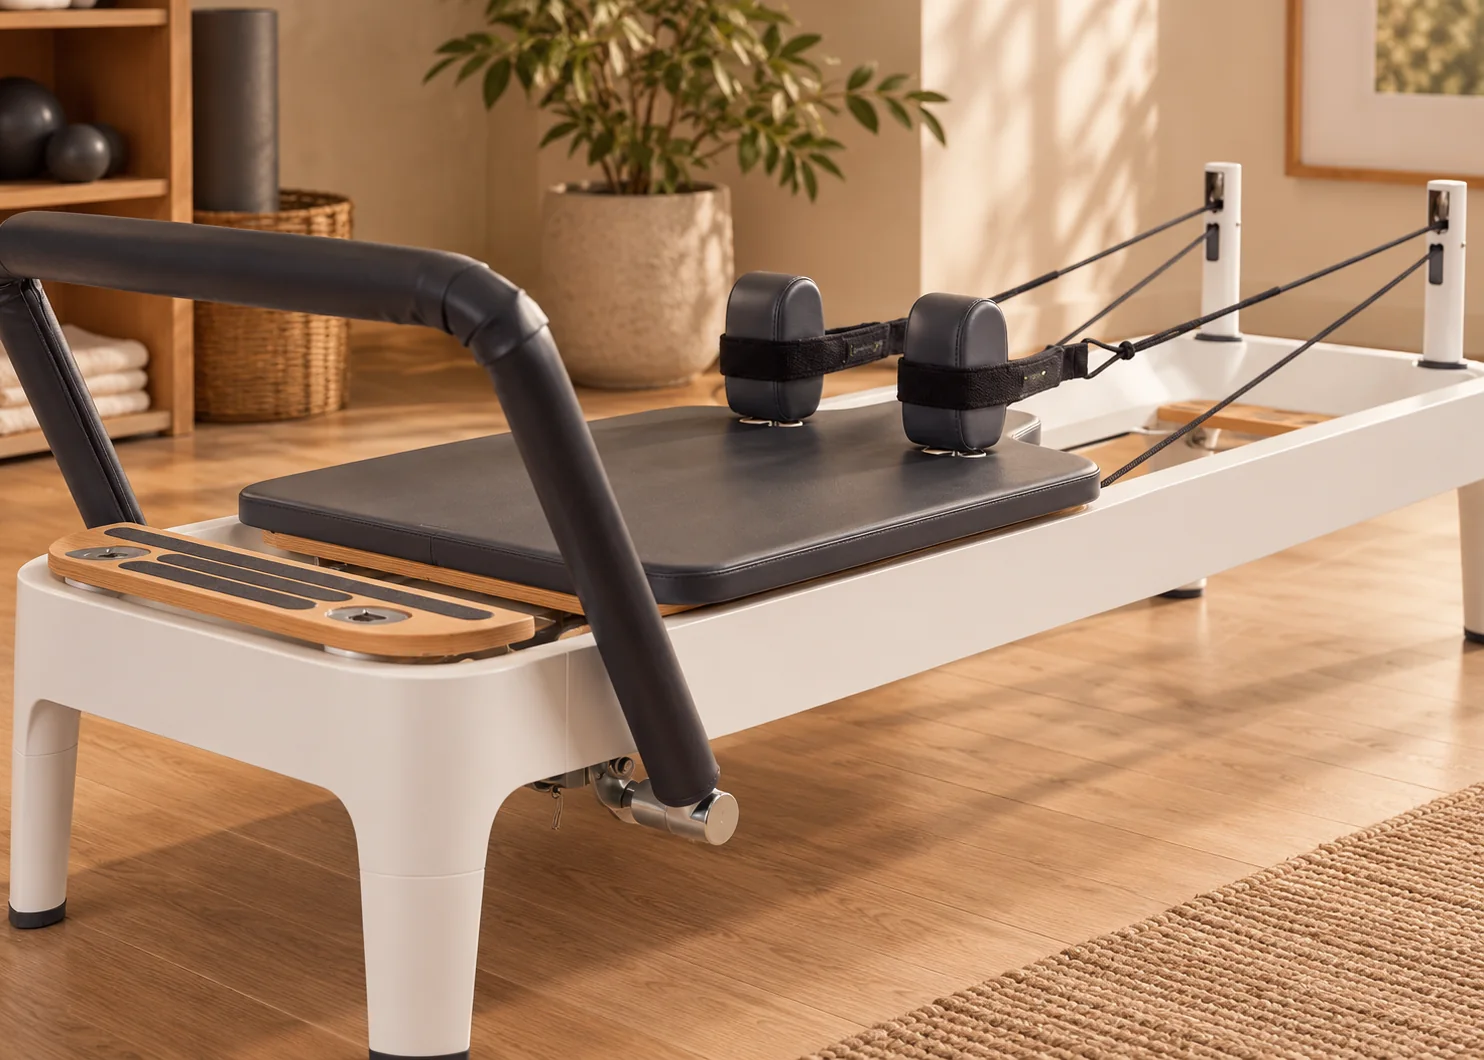
Before each exercise, check the parts you are about to use:
- Footbar: confirm it is secure in the position specified for that exercise and your machine. If the model has a locking mechanism, engage it and check that it holds.
- Springs: check the required attachments and look for damage according to the manufacturer's maintenance instructions.
- Carriage and headrest: use the taught starting position, with comfortable head support. Change headrest position when the next exercise requires it.
- Ropes and loops: check that they are routed correctly, adjusted as taught, and free of twists.
- Surrounding space: clear the area needed to reach your arms out, step off, and use the box if included.
Spring colors and combinations are model-specific. A setting from a Studio Reformer class is not automatically the right setting for an Allegro 2 or another home machine. Follow your model's instructions and the exercise setup your instructor gives you.
If you are planning the space as well as the workout, leave usable room around the machine rather than fitting the frame tightly between furniture. The same clearance-first approach in my home gym essentials guide applies here. There is no single clearance number that suits every reformer and exercise.
How to Do the Six Reformer Exercises
Use these explanations to follow a lesson or review a movement you have been taught. Keep the first repetitions slow enough to notice what the carriage is doing. Return it smoothly between exercises, put the loops away before changing position, and use the mounting sequence taught for your machine.
Footwork
Footwork teaches you to bend and straighten your legs while your pelvis stays steady. I like it as an opening exercise because the supported position gives you a clear way to check knee tracking and carriage control.
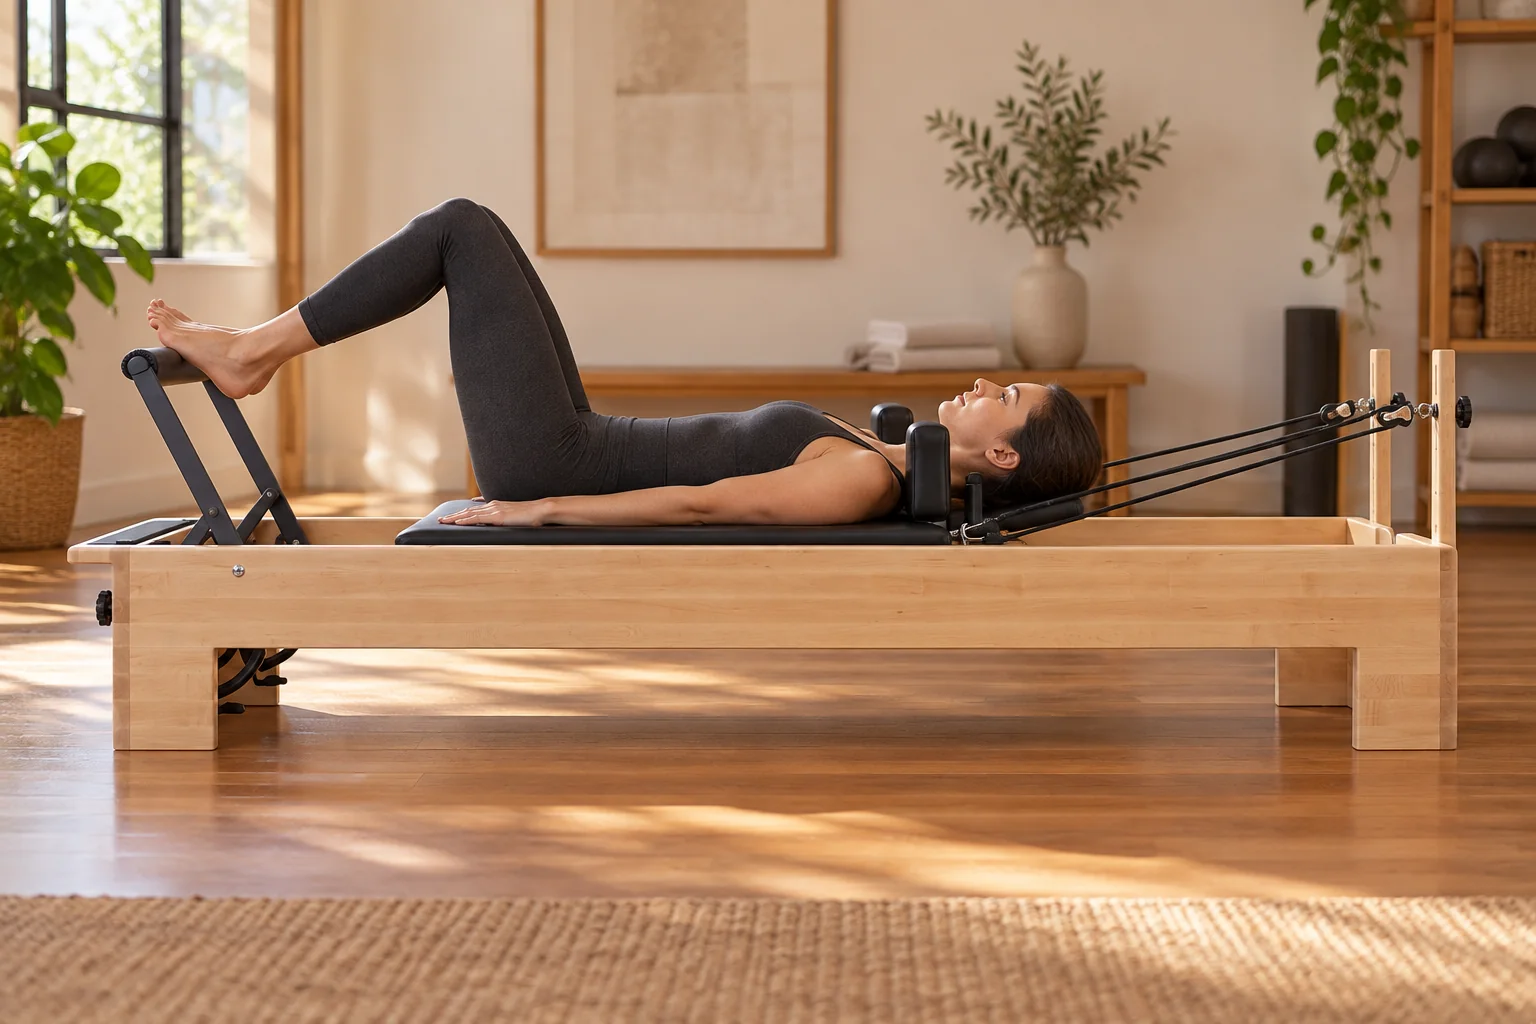
- Lie on the carriage with your head supported and arms resting alongside you. Place your feet on the securely positioned footbar in the taught foot position.
- Press the carriage away by straightening your legs through a comfortable range. Keep the knees aligned with the feet.
- Bend your knees to return, resisting the springs enough to avoid a sudden finish at the stopper.
For a parallel-heel variation, place the heels on the bar and keep the toes lifted. Forefoot and arch placements are other variations, not positions to switch between mid-repetition. Amy Havens' footwork demonstration explains how the foot position changes while the pelvis and ribcage remain stable.
Shorten the travel if the pelvis begins to move or the return becomes jerky. If you still cannot keep the movement steady, end the set. Have the range, bar position, and spring setting checked before trying again.
Supine Arms
Supine means lying on your back. Here, you hold the loops and move your arms while keeping your torso quiet. Supported feet can reduce the coordination demands compared with holding the legs in tabletop, where the hips and knees are bent and the feet are lifted.

- Lie back and take one loop in each hand. Begin with the arms above the shoulders, using the rope length and spring setting taught for the exercise.
- Press the arms toward your hips through a comfortable range, keeping a slight softness at the elbows.
- Bring the arms back up slowly, maintaining controlled rope tension.
I prefer that straight arm path for learning before adding circles. The useful check is whether the ribs stay settled as the hands move. Reaching farther by arching your back changes the task. The photo shows feet on the footbar; an instructor may use a different supported position or teach the tabletop variation.
If a loop repeatedly slips, stop and have the grip and loop size checked. Avoid winding the rope around your wrist to hold on.
Hundred Prep
Hundred prep introduces rhythmic arm pulses and breathing before you attempt the full Hundred. The traditional exercise combines arm movement with a lifted chest and legs, which adds demands on the abdomen, shoulders, and neck.
I recommend learning the breathing pattern with a head and leg position you can maintain comfortably. For the supported preparation described here, keep your head resting on the carriage and your feet on the footbar with the knees bent. Have this adaptation checked in your lesson before using it at home. The full Hundred adds a chest lift and lifted legs; lowering or straightening those lifted legs makes that version more demanding.
- Lie on your back with your head supported and feet on the secure footbar. Take one loop in each hand using the taught rope length and springs, then lower the arms toward your sides without lifting the ribs.
- Make small arm pulses alongside the torso. Keep the shoulders away from the ears.
- When the rhythm is comfortable, breathe in over five pulses and out over five. Start with a few cycles.
The name does not require you to complete 100 pulses on your first attempt. End the set if neck strain or breath-holding takes over. Learn the full version with feedback rather than extending the legs and lifting the head because a video looks more advanced.
Mermaid
Mermaid adds a seated side bend to the session. You use one hand on the footbar while the other arm reaches overhead, letting the carriage move as you bend to the side. The basic version is enough before adding rotation.

- Sit sideways on the carriage. In the traditional Z-sit, bend both knees so one leg folds in front of you and the other folds behind, with the shin near the shoulder rests. Use the seated adaptation taught for you if that position is uncomfortable. Place the nearer hand on the footbar, in front of that shoulder.
- Reach the free arm overhead and bend toward the bar while guiding the carriage outward.
- Return upright with control, then repeat on the other side using the same comfortable range.
The traditional folded-leg position can be uncomfortable at the hips or knees. Ask for a seated modification rather than forcing the knees down. Keep the movement mainly to the side instead of collapsing forward over the bar.
I judge the range by whether you can return upright without pulling yourself abruptly with the supporting arm. A smaller bend you can reverse smoothly is a useful starting point.
Low Pelvic Lift
This low pelvic lift is a small hip lift while you move the carriage with bent knees. It differs from a high bridge: Amy Havens' demonstration keeps the ribcage on the carriage and uses a modest lift of the pelvis.
Learn this variation in person first, including the headrest position on your machine. Keep the upper body supported throughout this small lift before adding carriage travel.
- Lie on your back with the taught foot placement and spring setting.
- Gently tilt the pelvis and lift it only a small distance while keeping the ribs supported.
- Move the carriage through a short range, keeping the knees bent and the low-lift position steady.
- Return the carriage, then lower the pelvis with control.
A larger lift is a different progression. Stop if the position creates back or neck discomfort; this exercise is an optional addition, so you can keep footwork in the routine while getting the setup checked.
Pulling Straps With a Long Box
Pulling straps adds back and arm work, with a small chest lift as the arms reach behind you. It needs a suitable long box, a padded accessory placed lengthwise on the carriage. Learn how to position the box and get on and off before practicing the movement.

- Lie face down on the secured box, facing the pulley end, with your torso supported near the upper edge of the box and legs reaching straight back at box height. Keep the knees straight and the legs active without lifting them above the torso.
- Fold the loops and hold them together with the shortened ropes as taught. Begin with gentle tension and arms reaching down and forward; the ropes should not hang slack.
- Draw the straight arms toward your hips as the chest lifts modestly. Keep the neck in line with the upper back.
- Return the arms forward while lowering the chest, controlling the carriage.
Keep the chest lift modest and avoid a sharp bend in the lower back. I recommend learning pulling straps 1 before the wider-arm second version because it gives you one straight arm path to control. If you do not have the right box or cannot lie comfortably in this position, leave it out of the home session and ask for a taught alternative.
A Beginner Pilates Reformer Workout
Build a short Pilates reformer routine from movements you have already learned. The example below starts with supported leg and arm work and finishes with a seated stretch. Use these amounts as starting suggestions for the exercise versions and settings confirmed in your lesson.
| Step | Exercise | Suggested starting amount | Check |
|---|---|---|---|
| 1 | Setup and relaxed breathing | A few unhurried breaths | Comfortable position and ready equipment |
| 2 | Footwork | 6 to 8 repetitions in one taught foot position | Smooth outward and return travel |
| 3 | Supine arms | 5 to 8 controlled presses | Quiet ribcage and shoulders |
| 4 | Hundred prep | 2 to 4 comfortable breathing cycles | No neck strain or held breath |
| 5 | Mermaid | 3 slow repetitions per side | Comfortable seat and smooth return |
Take enough time between exercises to return the carriage, put away the loops, and change the setup. The first practice might take around 15 to 20 minutes including those pauses; the clock is an estimate, not a reason to rush. Keep the first round short, then decide whether another round would still be controlled.
Low pelvic lift and pulling straps can be added later if taught and suitable. I add one new exercise at a time so its effect on fatigue and setup time is easier to notice. You can practice the four starter movements without buying a box or jumpboard.
If you also train with weights, place this practice where it fits without making both sessions harder to recover from. My full-body dumbbell plan gives you a separate way to organize loaded strength exercises.
How Often Should You Do Reformer Pilates?
For a beginner, I suggest one or two manageable sessions a week to start, then adjust after seeing how you recover and how much instruction you need. That is a conservative starting suggestion, not a proven ideal frequency. Your other training and the demands of the class affect what you can repeat comfortably.
Progress first by making the same exercise smoother and more consistent. Once you can repeat the taught position, discuss adding repetitions, range, or resistance with your instructor. Change one detail at a time so you can tell what improved.
| What you notice | Next step |
|---|---|
| Smooth movement and easy recovery | Repeat once more, then discuss one small progression |
| Carriage jolts or position changes | End the set and review setup before adding work |
| Technique worsens late in the session | Use fewer repetitions or a shorter session |
| Pain or persistent discomfort | Stop the exercise and seek appropriate assessment |
A lighter spring is not an automatic progression or regression. Springs can supply support as well as resistance, so a change needs to suit the exercise and your control of the carriage. Keep the recorded combination until you have learned the reason for changing it.
When I assess progress, I want a like-for-like comparison: the same foot placement, bar position, springs, and number of repetitions. A smoother return under those conditions tells you more than doing extra repetitions after changing the setup.
FAQs
Can you start reformer Pilates as a beginner?
Yes, beginners can start reformer Pilates with introductory instruction that teaches the apparatus and adapts the exercises to them. Mat Pilates experience is not a prerequisite, but mounting, spring changes, loops and model-specific supervision requirements still need instruction.
Is reformer Pilates hard?
Reformer Pilates can be challenging because you coordinate movement, breathing and a sliding carriage. Choose instruction that gives you time to learn the setup and control the return, rather than a class where you repeatedly miss changes or lose control.
Is reformer Pilates strength training?
Reformer Pilates can include strength training when spring resistance meaningfully challenges the muscles and the work progresses over time. Check the muscles trained and the effort in the final controlled repetitions, because a class focused on gentle mobility may leave strength goals uncovered.
Can reformer Pilates build muscle?
Reformer Pilates may support muscle gains, but the small 2025 trial showing changes in muscle-mass estimates studied sedentary women with overweight or obesity during eight weeks of supervised training. Its electrical-impedance measurement and inactive comparison group cannot establish directly imaged muscle growth or equivalence to a weight-training program.1
Is reformer Pilates a good workout?
Reformer Pilates can be a good workout for controlled movement, strength and endurance when the exercises and effort challenge those abilities. Assess aerobic fitness and specific lifting goals separately rather than assuming one class covers everything.
How much space do you need around a Pilates reformer?
A Pilates reformer needs its model-specific clearance plus room for the planned exercises. Include arm reach, side access, getting on and off, and any box or platform setup instead of relying only on frame dimensions.
Choose Your First Home Reformer Session
My starting choice is the four movements in the practice table, using the versions checked in your lesson. Keep the settings beside the machine so transitions do not become a memory test. Leave box work for later if mounting the box or controlling the ropes is still unfamiliar.
Your next session can repeat the same plan. Use the notes from the first one to decide whether to keep the setup, reduce a difficult part, or ask for a progression. If you cannot remember an exercise's spring setting or how to get into position, take that question to your next lesson before practicing it again.
This guide is for general education and is not medical advice or an individualized Pilates program. If you have an injury, ongoing pain, pregnancy-related exercise needs, or a health condition that affects training, get advice from a qualified clinician and an appropriately trained Pilates instructor.
References
- Gökalp Ö, Kirmizigil B. Effects of reformer pilates on body composition, strength, and psychosomatic factors in overweight and obese women: a randomized controlled trial. Scientific Reports. 2025;15:23602. doi:10.1038/s41598-025-09683-8. Read the study.