
Power Rack Dimensions: How Much Space Do You Need?

Founder
I founded HomieGym to help you make informed decisions about training at home. My background includes university-level sports science education, practical coaching, gym training and combat sports.
Equipment editor on our team: Milutin Tucakov
Measure the rack, barbell, bench, loading access, and overhead movement separately, using transparent examples to plan a usable home gym.
Power rack dimensions tell you how much space the frame occupies. To know whether you can train in the room, you also need the barbell length, plate-loading space, bench position, and overhead clearance. A rack can physically fit while leaving you unable to load one end of the bar.
I plan the working area around the lifts first, then check the frame inside it. That gives you a better answer than a universal room size, because a plain four-post rack, a rack with rear storage, and a cable-equipped station use space differently.
Table of Contents
Power Rack Dimensions and the Space You Actually Need
You need two sets of measurements: the complete rack dimensions and the area required to use it. Read the product drawing for the exact configuration, then add the bar, bench, stored plates, moving attachments, and a clear way to enter and leave.

There is no single standard power rack size. The Rogue RML-390F, for example, has a published 48-inch front-to-back by 49-inch side-to-side footprint, 92.25-inch overall height, and 30-inch inside depth. Those numbers describe different boundaries; the 30-inch lifting bay is not the total depth you must reserve on the floor.
| Measurement | What it describes | What it leaves out |
|---|---|---|
| Overall width | Full rack span from side to side | Bar ends and loading access |
| Overall depth | Full rack span from front to rear | Bench entry and work in front |
| Inside depth | Lifting bay between front and rear uprights | Uprights, feet, and rear storage |
| Overall height | Highest assembled point in that configuration | Head, hands, bar, and plate travel |
| Working area | Equipment, movement, loading, and access together | Separate room uses unless you add them |
Check how the manufacturer labels length, width, and depth. Use the drawing to establish the orientation rather than assuming the first number always runs front to back. An upright height, crossmember length, or shipping-carton measurement can look like an assembled dimension when read without its label.
How Wide Is a Power Rack With a Barbell?
The loaded training setup is usually wider than the rack because the bar extends beyond its uprights. Plan from the exact bar's total length, then allow enough room at each end to carry plates into position, slide them on and off, and operate the collars.
As one sourced example, Rogue lists its Ohio Bar at 86.75 inches long. Center that bar on a 49-inch-wide RML-390F and its ends extend about 18.88 inches beyond the frame on each side: (86.75 - 49) ÷ 2. That is bar overhang, before loading access.
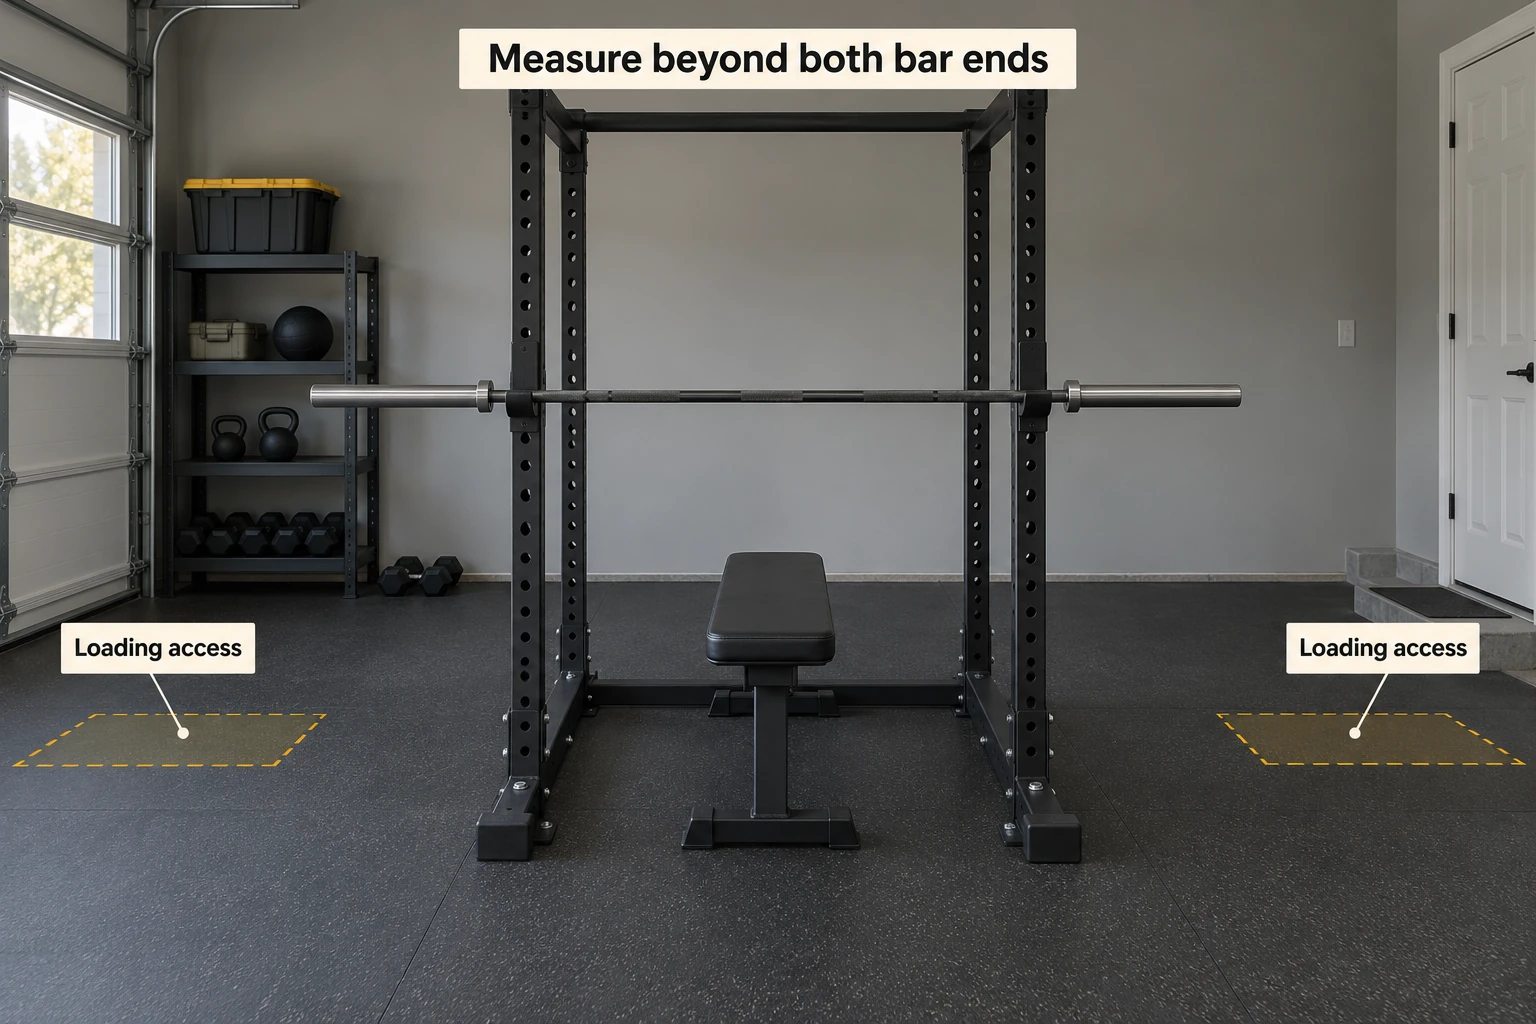
Suppose you mark an additional 18 inches beyond each bar end as a first layout trial. The resulting width is 86.75 + 18 + 18 = 122.75 inches, or about 10 feet 3 inches. That 18-inch allowance is an illustrative choice, not a manufacturer minimum or a guarantee that your plates and body will fit.
I use a taped layout to reject an awkward room before ordering. Mark the actual bar ends, then rehearse carrying and sliding a plate from storage without lifting weight on a makeshift rack. If you must turn sideways against a wall or step over other equipment, increase the access space or change the layout.
A shorter bar can reduce the overall span, but it must still fit the rack correctly. Check the distance between its inner sleeve collars, the J-cup positions, the manufacturer's compatibility requirements, and the sleeve space available for your plates. Do not choose a bar from total length alone.
How Deep Should a Power Rack Be?
The right inside depth gives you room for your planned lifting path, while the right overall depth fits the frame and everything behind or in front of it. Choose these separately. A shallow lifting bay does not automatically make a complete station compact.
On the PR-4000, REP offers crossmember depth options of 16, 24, 30, and 41 inches. Those are configuration choices rather than four universal room requirements. Ask for the full drawing showing uprights, footplates, stabilizers, storage, and any cable attachment you intend to install.

For inside-the-rack lifting, consider your stance, walkout, and forward movement during the squat. Then check whether the safety system covers that path. I prefer enough usable room to set up deliberately over a smaller number that only looks good in the floor plan. If you plan to lift outside the rack, verify that the exact rack and outside safety configuration are permitted.
Bench placement can determine the front-to-back layout. Position your chosen bench so you can reach the bar without an excessive reach behind you, place your feet, and complete the lift. A rear base stabilizer, lower crossmember, or cable hardware may interfere with the bench's rear foot or wheels even when the bench is narrow enough.
Check bench dimensions and support before fixing its position on that floor plan.
For a hypothetical layout with a 48-inch-deep rack, 12 inches behind it and 48 inches in front, the marked depth is 12 + 48 + 48 = 108 inches, or 9 feet. Combined with the width example above, that rectangle is about 10 feet 3 inches by 9 feet, approximately 92 square feet. These assumed clearances are a planning example; confirm them with your exact bench, movements, instructions, and room access.
If your rear storage holds full-size plates, measure the furthest plate edge. Do the same with a dip station or lever arm in its working position. A taped rectangle should reflect the widest and deepest configuration you will actually use, while keeping a clear exit path.
Review rack attachment options for their compatibility and added working space.
How Tall Should a Power Rack Be?
A power rack should be tall enough for your intended setup and low enough for both assembly and movement beneath the lowest obstruction. A ceiling measurement by itself does not tell you whether pull-ups or overhead presses will work.
Manufacturer heights also describe different things. REP lists 80- and 93-inch upright options for the PR-4000; Rogue lists 92.25 inches as the overall RML-390F height. Check the highest assembled point of your chosen configuration rather than comparing those labels as though they were identical.
Measure from the finished training surface, including rubber or a platform. For example, a 96-inch floor-to-ceiling space with 0.75-inch flooring leaves 95.25 inches above that surface. A 92.25-inch rack would leave 3 inches between its published top and the ceiling. That confirms frame clearance only, not adequate headroom above its pull-up bar.
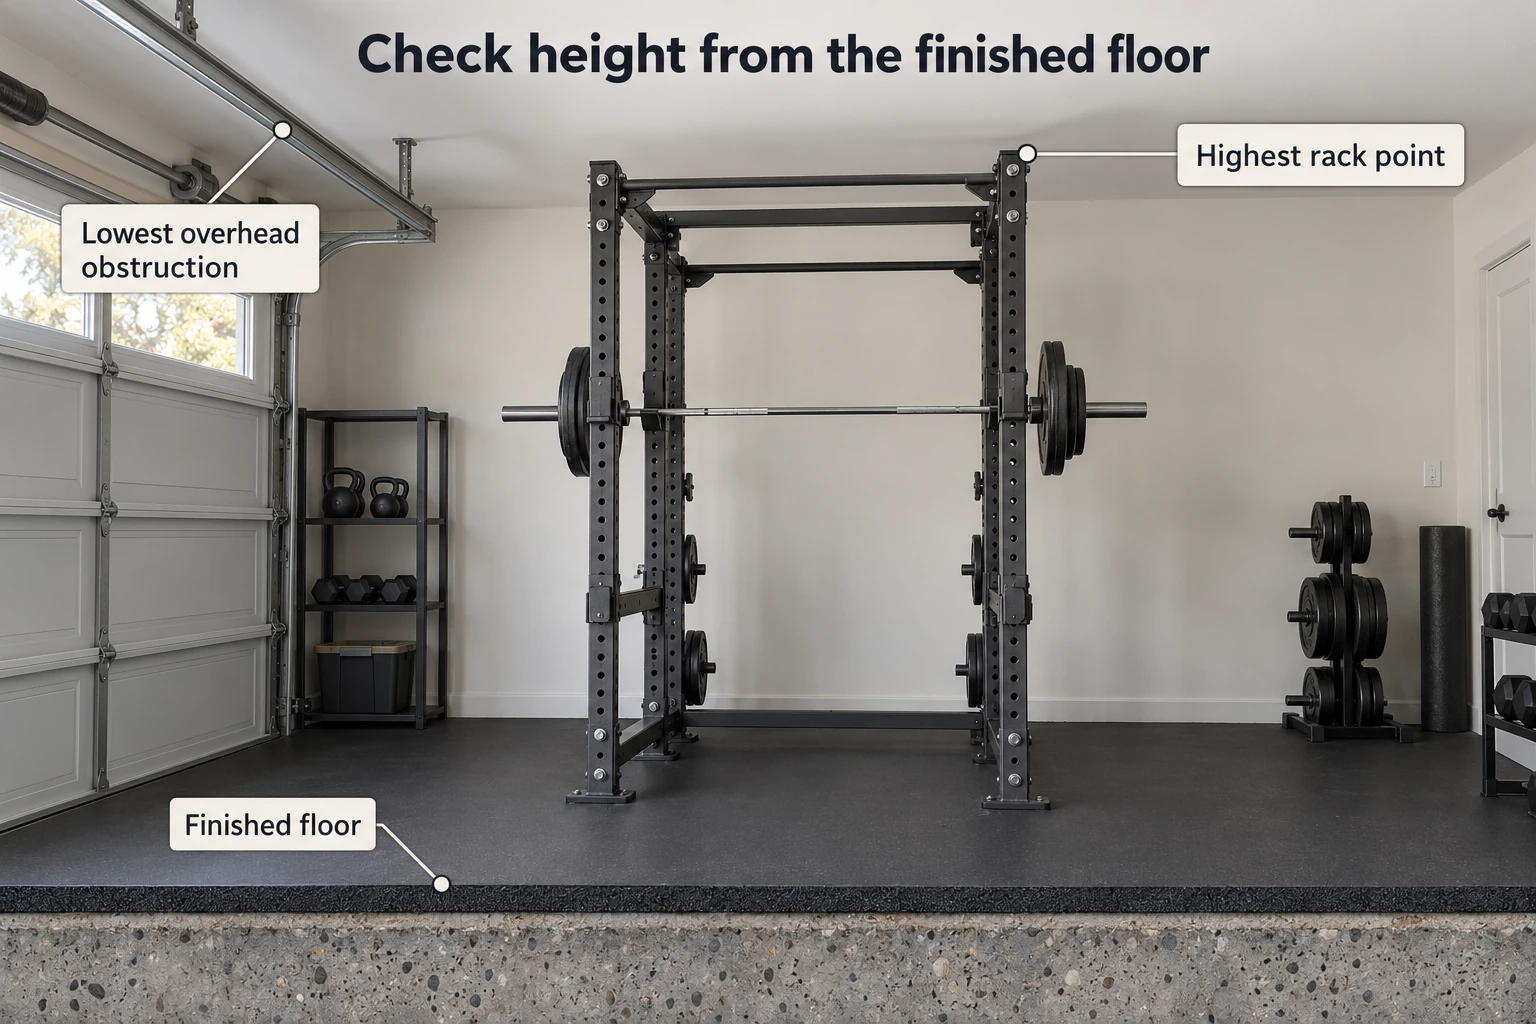
For pull-ups, account for where the bar sits, your grip, and how far your head and body rise. For overhead pressing, include the highest point of the bar and plates through your actual movement. REP's general rack guidance calls for ceiling checks for both activities. There is no one extra-height allowance that guarantees either will fit every person.
Look for garage-door rails and the door's full travel, beams, lights, ducts, fans, and any lower ceiling section. Check the manual's assembly sequence too: an upright may fit when standing but require a different approach to raise or connect it. Do not trim a rack or omit a crossmember to solve a height problem.
Walls, Floors, and the Route Into the Room
Wall clearance depends on what needs to happen behind and beside the rack. You may need to reach hardware, load storage horns, adjust attachments, or leave space for a moving cable component. Follow the exact installation drawing and add access for the tasks you will perform.

A rack's weight is another model-specific specification. The RML-390F is listed at 295 lb before you add a bar, plates, bench, person, and accessories. Do not confuse shipping weight with the assembled equipment weight, or treat empty-rack weight as the total load placed in the room.
An apartment or upstairs room needs more than a favorable floor area. Confirm the building's suitability and permissions for the complete setup and intended use, including mounting and noise, with the property owner or a qualified building professional as appropriate. Rubber flooring protects surfaces in some uses; it does not establish structural capacity or guarantee quiet lifting.
Finally, check the delivery route: doors, corners, stairs, landings, and the dimensions and weight of the largest component. A rack that can be carried in as separate parts may be difficult to move after assembly. Our home gym flooring guide covers surface choices, but flooring selection should follow the room and installation decision.
Mark the Complete Setup Before Ordering
Start with one exact rack configuration, one bar, and the bench and attachments you will use. Mark the frame and working area separately, then keep the manual and product drawing beside your room measurements.
- Record the full frame width, depth, and highest assembled point.
- Mark the actual bar length and rehearse access to both ends.
- Check the bench, lifting path, storage, and attachment travel.
- Measure overhead movement and the assembly route.
- Confirm mounting, floor suitability, door swing, and an exit path.
If the layout works only after removing necessary loading or access space, choose another size or configuration. I would keep a smaller, usable setup ahead of a larger rack that makes every plate change awkward. Take the measured layout to the power rack listings and compare full drawings rather than the headline depth.
FAQs
How much space do you need on either side of a power rack?
Plan side clearance from each end of the bar so you can load plates and use the collars without obstruction. For example, marking 18 inches beyond each end adds 36 inches to the bar's total length; that is a layout trial, not a manufacturer minimum. Check the marked space with your plates, storage, body position, and the rack's instructions before treating it as usable clearance.
Will a power rack fit under an 8-foot ceiling?
Some power racks fit under an 8-foot ceiling, but the exact assembled height, flooring, obstructions, and intended movements determine whether you can use them there. Frame clearance does not establish pull-up or overhead-press clearance.
How far should a power rack be from the wall?
Place the rack far enough from the wall to meet its installation instructions and operate the hardware, storage, and attachments you will use. There is no universal rear gap that covers every rack configuration.
Can you put a power rack upstairs?
A power rack may be suitable upstairs only after the building, full equipment load, intended lifting, installation, and property rules have been assessed. Do not infer suitability from rack footprint or rubber flooring alone.
The layout calculations are illustrative, not prescribed clearances or structural approval. Follow the exact equipment instructions and obtain qualified advice where building suitability or installation is uncertain.